Until recently, I last wrote Java in anger in 2002. IntelliJ IDEA had just been released; it wasn’t remotely on my radar. I honestly can’t remember what IDE we were using back then, but it certainly was a very long way to the fully featured IDE that JetBrains produce today. Here’s my experience of using IntelliJ IDEA for the first time.
Downloading IntelliJ IDEA
There’s a lot going on when you first load IntelliJ IDEA, but I learned pretty quickly that there are also some good first steps you can take to make your experience a little more comfortable. The first thing I would say is that it’s an enterprise tool so there is a learning curve. There’s no getting around that – it’s the same with any new piece of enterprise software; you do need to give it some time and be willing to go on a learning journey. Fortunately for us, JetBrains have, in my opinion, done a very good job at supporting developers on that learning curve. So, if you’re sitting comfortably, here are my recommendations.
-
Figure out which version of IntelliJ IDEA you need. I once offended my now-colleague Trisha Gee by asking her which IDE to use because I didn’t know that IntelliJ IDEA Community was free. Foolishly, I assumed that because it was an insanely powerful IDE that it couldn’t possibly be free. I was appropriately schooled by a rather irritated Trisha and told in no uncertain terms that I could use IntelliJ IDEA for FREE. Honestly? Mind blown. I then decided that there must be a catch, so I assumed (see a pattern here?) that it would only be free for me to muck about and not free for commercial development. Wrong again, Helen, wrong again.
-
Next up, download JetBrains Toolbox, even if you’re only using IntelliJ IDEA. I promise you it’s worth it. This cute little box will sit on your toolbar, chill out and manage all the installs and updates to IntelliJ IDEA with minimal input from yourself. Use your new JetBrains toolbox to download the version of IntelliJ IDEA you require and manage your licensing requirements.
Okay, great! You’ve got a shiny version of IntelliJ IDEA downloaded. Let’s get started!
Running IntelliJ IDEA for the First Time
-
You’ll be asked to choose between Darcula and Light for your UI theme. I am not getting into this argument. I like light, deal with it. Click Next: Default Plugins to move on (unless you’re in a rush in which case click Skip Remaining and Set Defaults). IntelliJ IDEA does a great job of selecting the plugins that you’re most likely to need – these are the Default plugins. You can disable some of them if you want to but if you’re not entirely sure just leave them because you can tinker with them later.
-
Click Next: Featured plugins, this is a list of plugins that are the most common ones. Feel free to go rummaging around for plugins, but keep it real – the more plugins IntelliJ IDEA has, the more it has to deal with as well as being your awesome IDE. I recommend you build the plugins up so you get used to IntelliJ IDEA out-of-the-box-almost to start with. With that in mind, you should definitely go ahead and grab Key Promoter X and IDE Features Trainer if you’re new to IntelliJ IDEA (which you probably are given you’re reading this)! Now click Start Using IntelliJ.
Little note here, if you screw up your settings and want to unwrap IntelliJ IDEA all over again, go to File > Manage IDE Settings > Restore Default Settings. This is relatively new and can be a very useful learning experience.
Starting a New Project in IntelliJ IDEA
-
I’m going to go ahead and start a new project. Here’s where we need to sort our Java version out. IntelliJ IDEA is pretty smart about this. It will go and look for the Java versions you’ve already got installed, if there are any. If it finds them, it will populate the Project SDK with them. If it doesn’t find any it gives you an option to download them. You can select your Vendor and your Version and click Download. I recommend you leave the default Location because again, IntelliJ IDEA is smart and knows exactly where to look to find what it needs.
-
You can select additional libraries here if you want to and you know what you want. I am going to leave them blank and click Next.
-
Next up, we have Templates. You can create templates from existing projects to recreate later, however on new installations the only template available will be Command Line App. This is a boilerplate Java application with a class and a method. If you’re new to IntelliJ IDEA, it’s worth selecting this option just to get a feel for the file structure and inner workings.
-
Go ahead and enter a Project name. The Project location will be constructed from the name although you can change it if required. If you want to change the Base package you can do but for now, I recommend you go ahead and click Finish.
And there you have it! One shiny new IntelliJ IDEA project!
A Note on the ‘Release Version’
If you’re anything like me, the first thing you do is throw caution to the wind and go change a bunch of settings in the IDE because you ‘know what you’re doing’. Well, turns out, I didn’t! So, word of warning – if you see this error, it means your ‘Project bytecode version’ is set to something higher than your ‘Project SDK’ (and thus Project language level)’:

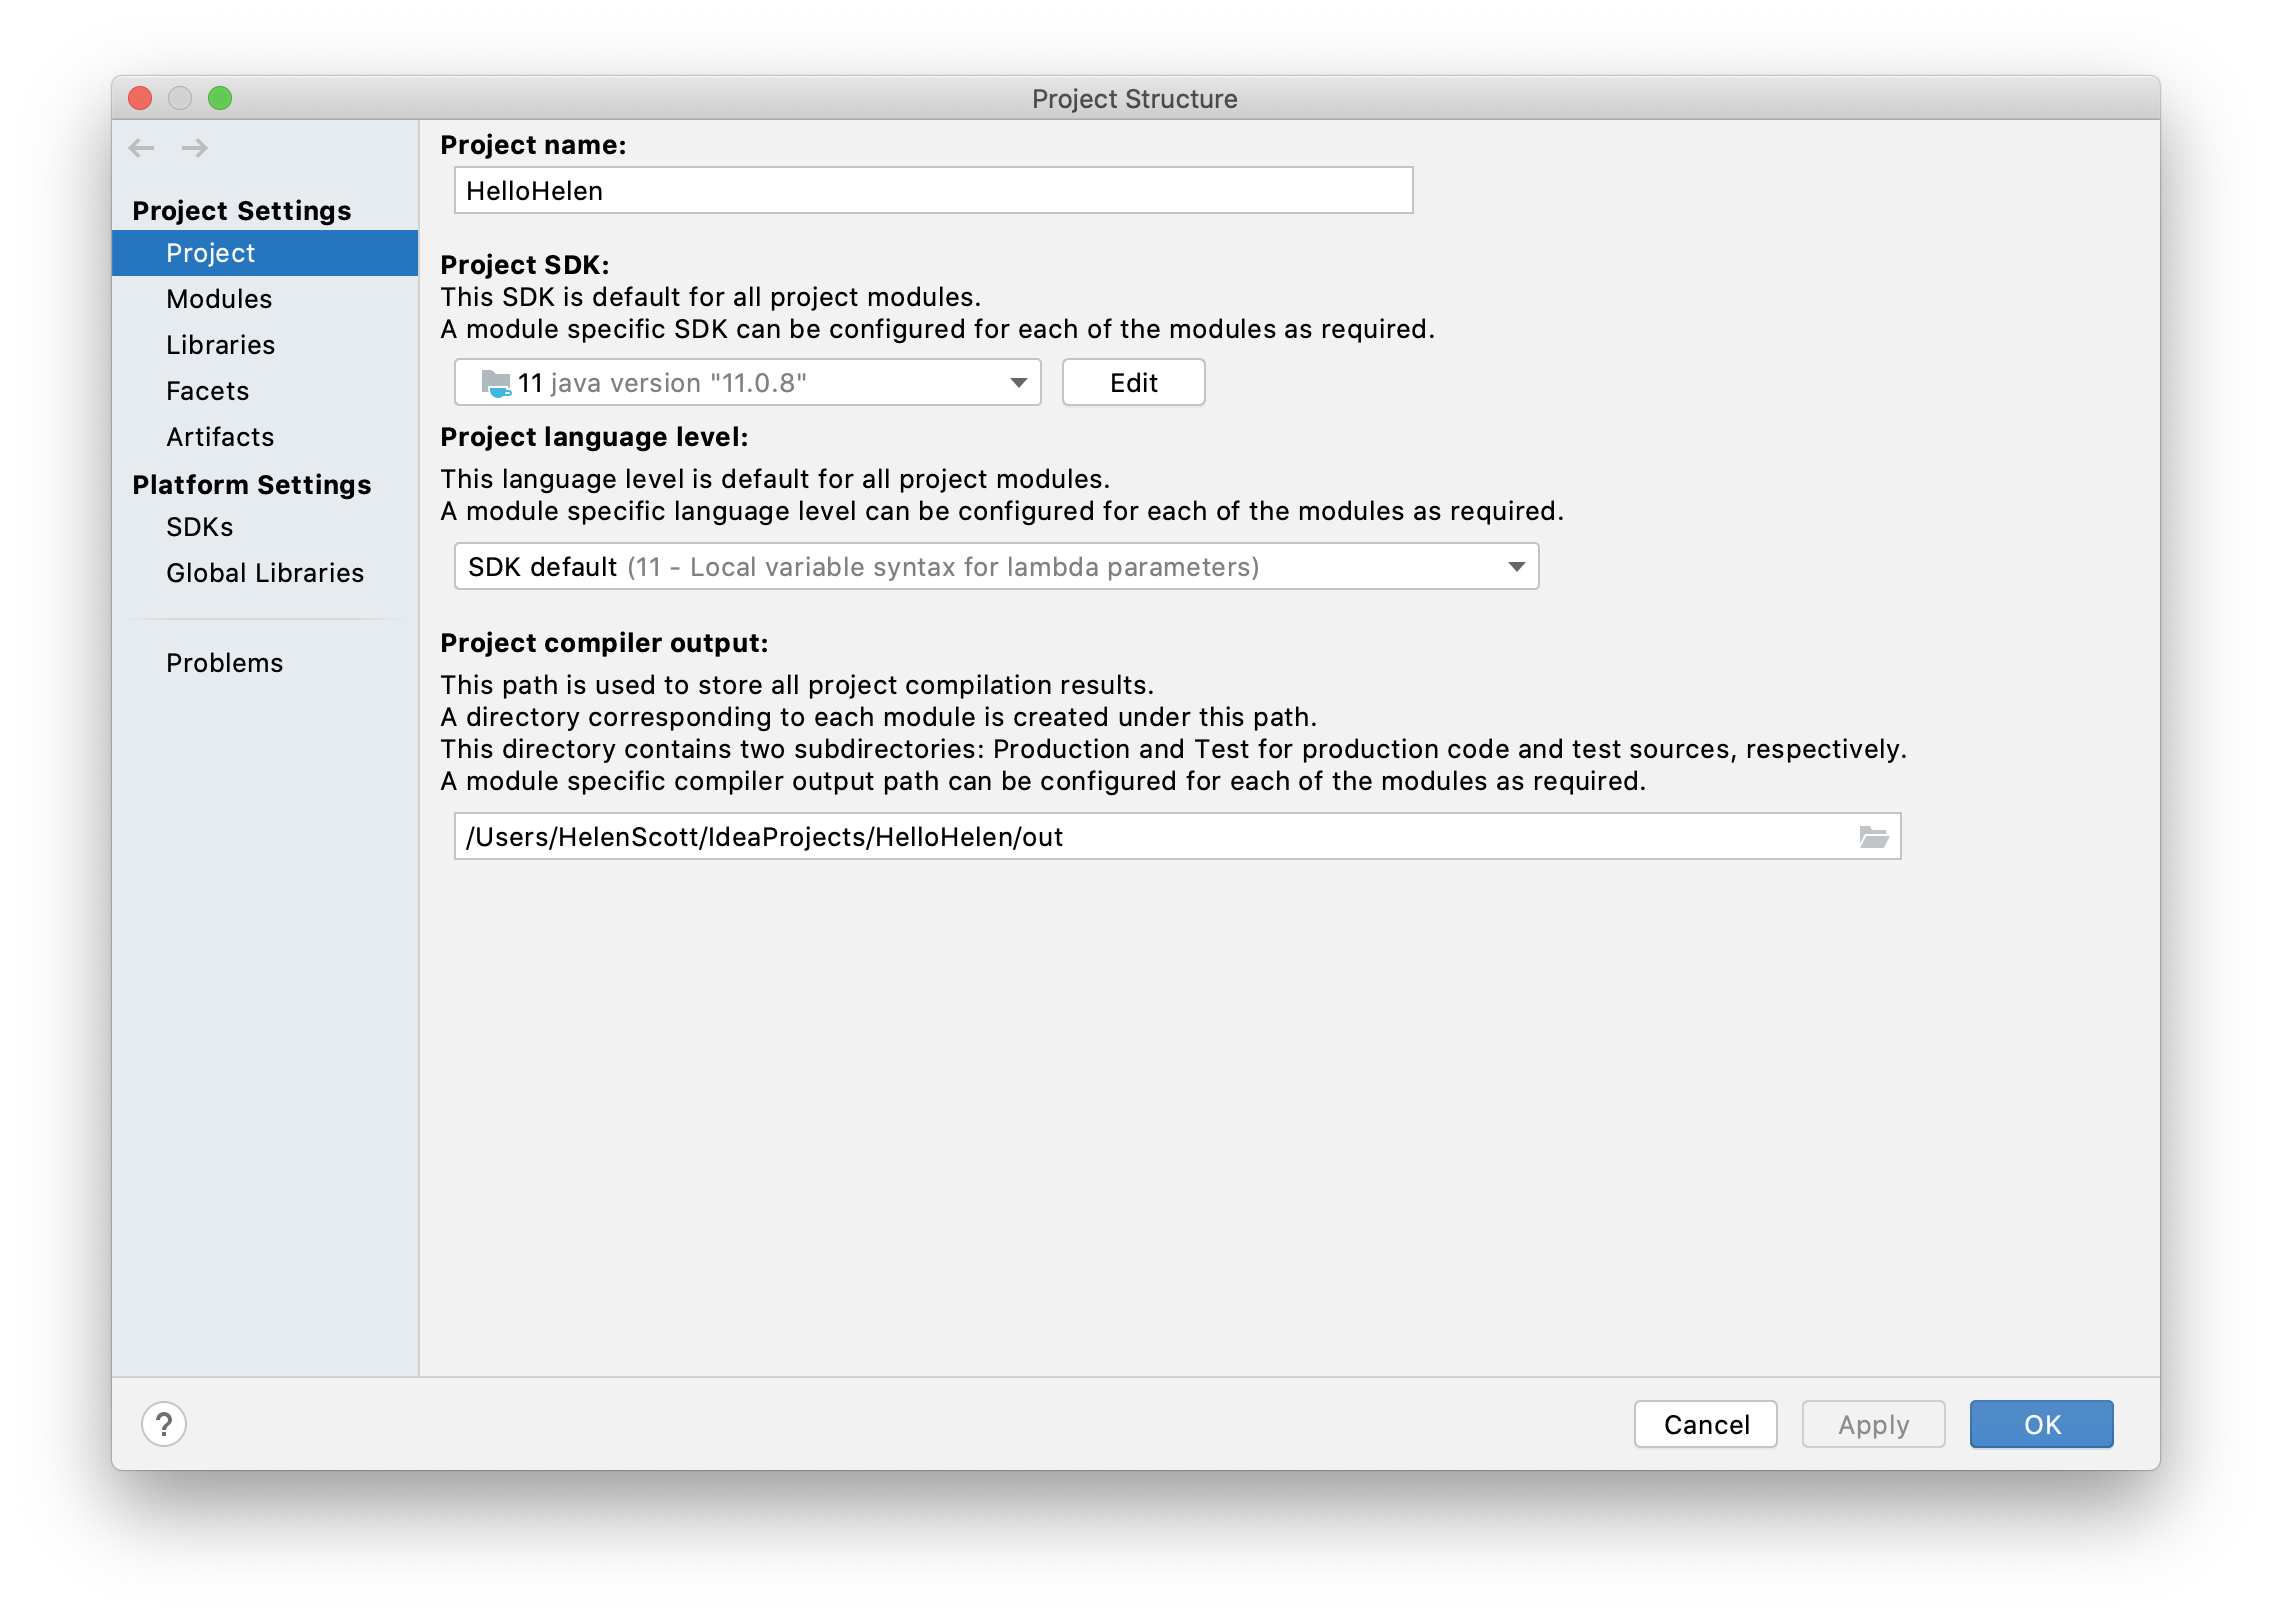
Check your SDK setting by using ⌘; on macOS, or Ctrl+Alt+Shift+S on Windows/Linux and looking at your Project Settings > Project, specifically your Project SDK and Project Language Level values and make a note of them.
Next, check your Project Bytecode version by using ⌘, on macOS or Ctrl+Alt+S and search for Build, Execution, Deployment > Compiler > Java Compiler. Your Project bytecode setting needs to either be the same as your Project language level, or something lower than it, such as Java 11. Then you can rebuild the project.
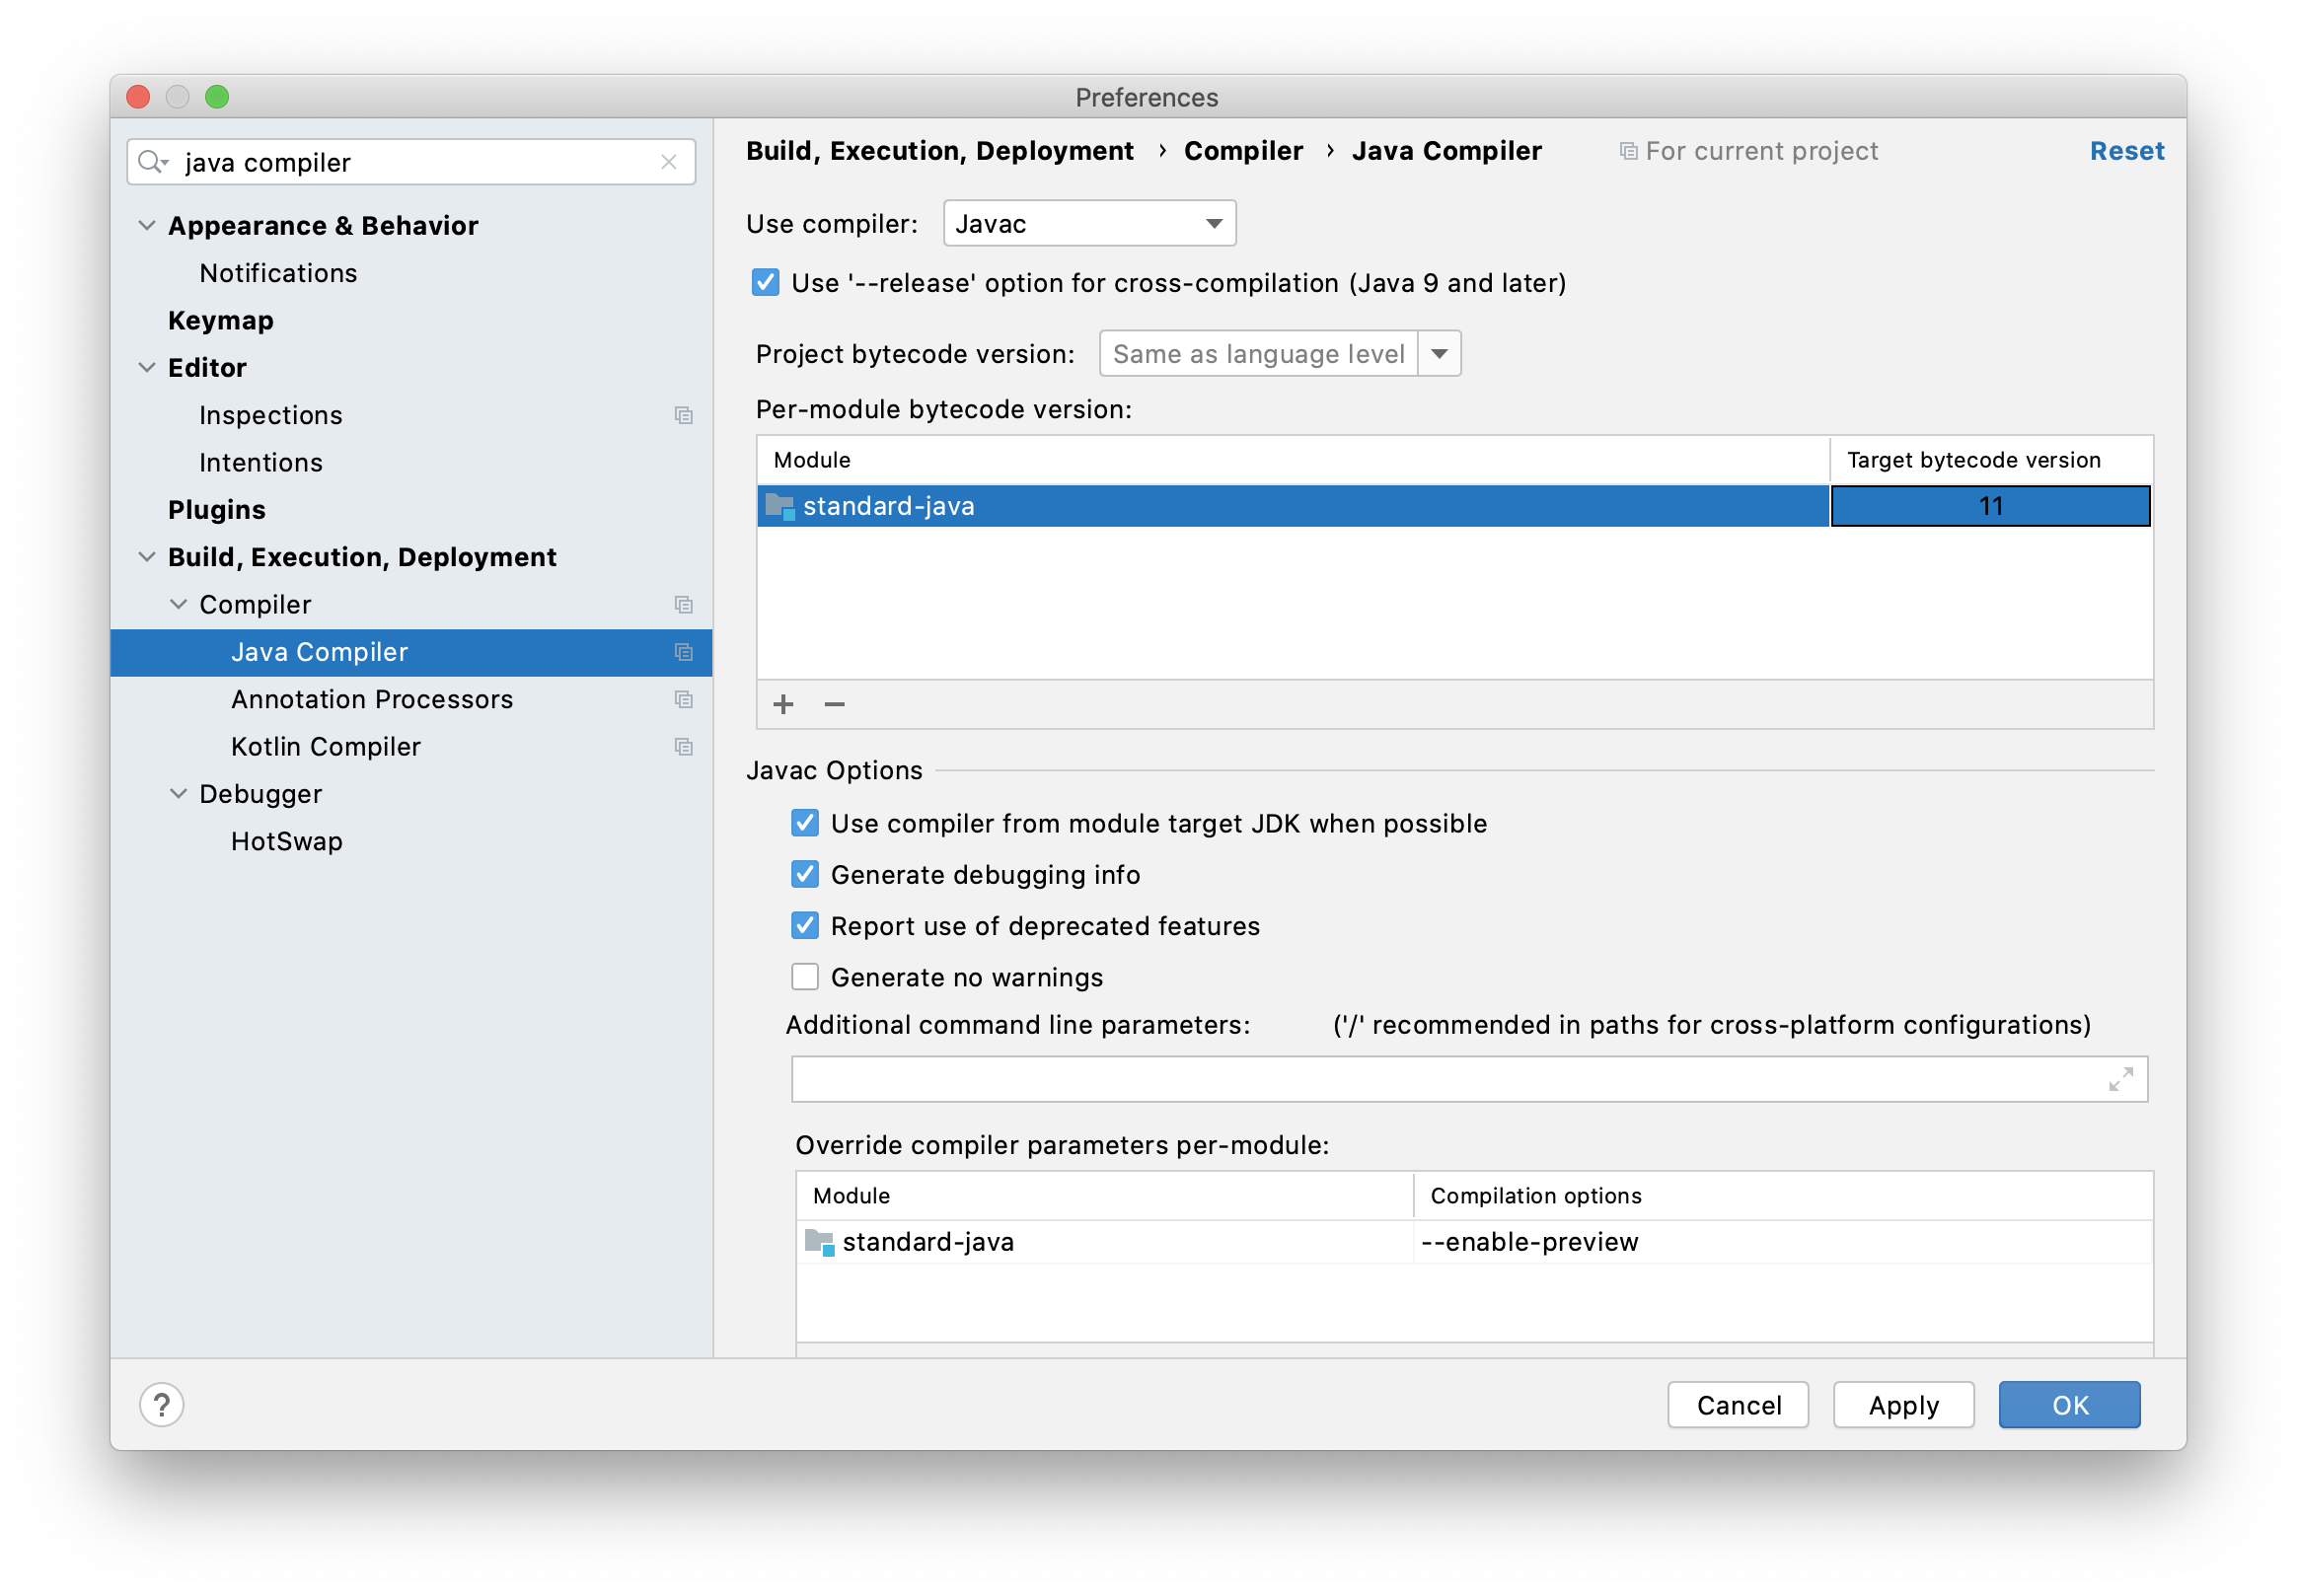
Being new to IntelliJ IDEA, something else that I wondered was what’s the difference between the Project SDK and the Project language level. As it turns out, the Project SDK are the tools you need to develop Java (seems fair), whereas the Project Language Level refers to the assistance that IntelliJ IDEA will give you in the editor. The two settings can be different as well. Your Project language level will restrict what inspections IntelliJ IDEA applies to your code and determine which compiler is used to turn your Java code into bytecode. You can override the compiler settings as I showed above if you don’t want to compile your code with the Project Language Level.
Summary
I can remember hating getting my environment set up at university – and I screwed it up regularly too. There is absolutely no doubt that IntelliJ IDEA makes the whole process of running ‘HelloWorld.java’ a whole lot easier. It does a great job of obfuscating the settings until you need them and will hold your hand throughout the process of setting up your environment without you breaking into a sweat about your classpath setting. Yes, you can break it, but you can also fix it very easily.
The discussion of whether to use an IDE, or not, is one that polarises people. As someone returning to Java after a long period of absence, working with an IDE of this calibre is like having a really knowledgeable friend help you achieve your goal (to run HelloWorld.java) and just that, as quickly and as efficiently possible. I know I’m still scratching the surface of what IntelliJ IDEA can do, but I’m a huge fan of the right information at the right time (which is when I need it) and IntelliJ IDEA does this very well. I’m looking forward to finding out more!