Using Code With Me to Collaborate on Getting to Know IntelliJ IDEA

As I’m sure you remember, back in March 2020 the office dwellers were sent home indefinitely. I recall my colleagues expressing opinions from “this is silly and will only last a week” to “this marks the point the world changes forever”; those in the latter group were much closer to reality. I was on holiday at the time so when I returned, I duly drove into the office, loaded everything from my desk into my car and settled into working on the dining room table – sound familiar?

After a few months of working at the dining room table we too moved from “this is silly” to “the world is changing”. I made space in our tiny box room and tried to make a workspace that was conducive to productivity. Another few months passed and a series of fortunate conversations led to me interviewing at JetBrains for a Java Developer Advocate. They hired me (yay!) and I started my new job in July 2020. That was it, I was one of them, I was remote, but I wasn’t alone.  

JetBrains Code With Me entered the Early Access Program (EAP) a couple of months later. I didn’t realise at the time just how central Code With Me would be in my life in the next two years. As Trisha mentions in this blog post, our book Getting to Know IntelliJ IDEA was born at the same time. Given that we were both Java Developer Advocates at JetBrains at the time (Trisha has since left) and working in different countries, we took the most obvious route for book collaboration – Code With Me!

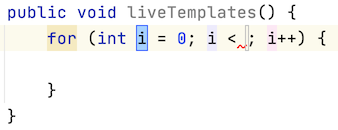
For those of you who don’t know what Code With Me is, the tl;dr is a collaborative programming service. Code With Me allows you to invite others to join you in your IDE, even if they don’t have IntelliJ IDEA installed. Many of you will be familiar with pair programming and you’ve likely done a bit of it in your time. Swarm programming is similar just taking the number of participants to a bigger number than the 1-1 mapping you get in pairing.

Of course with Trisha and myself, we were a pair so no swarming was required. The most common pairing model is where one person navigates and another person drives, but I am getting ahead of myself; back to Code With Me!

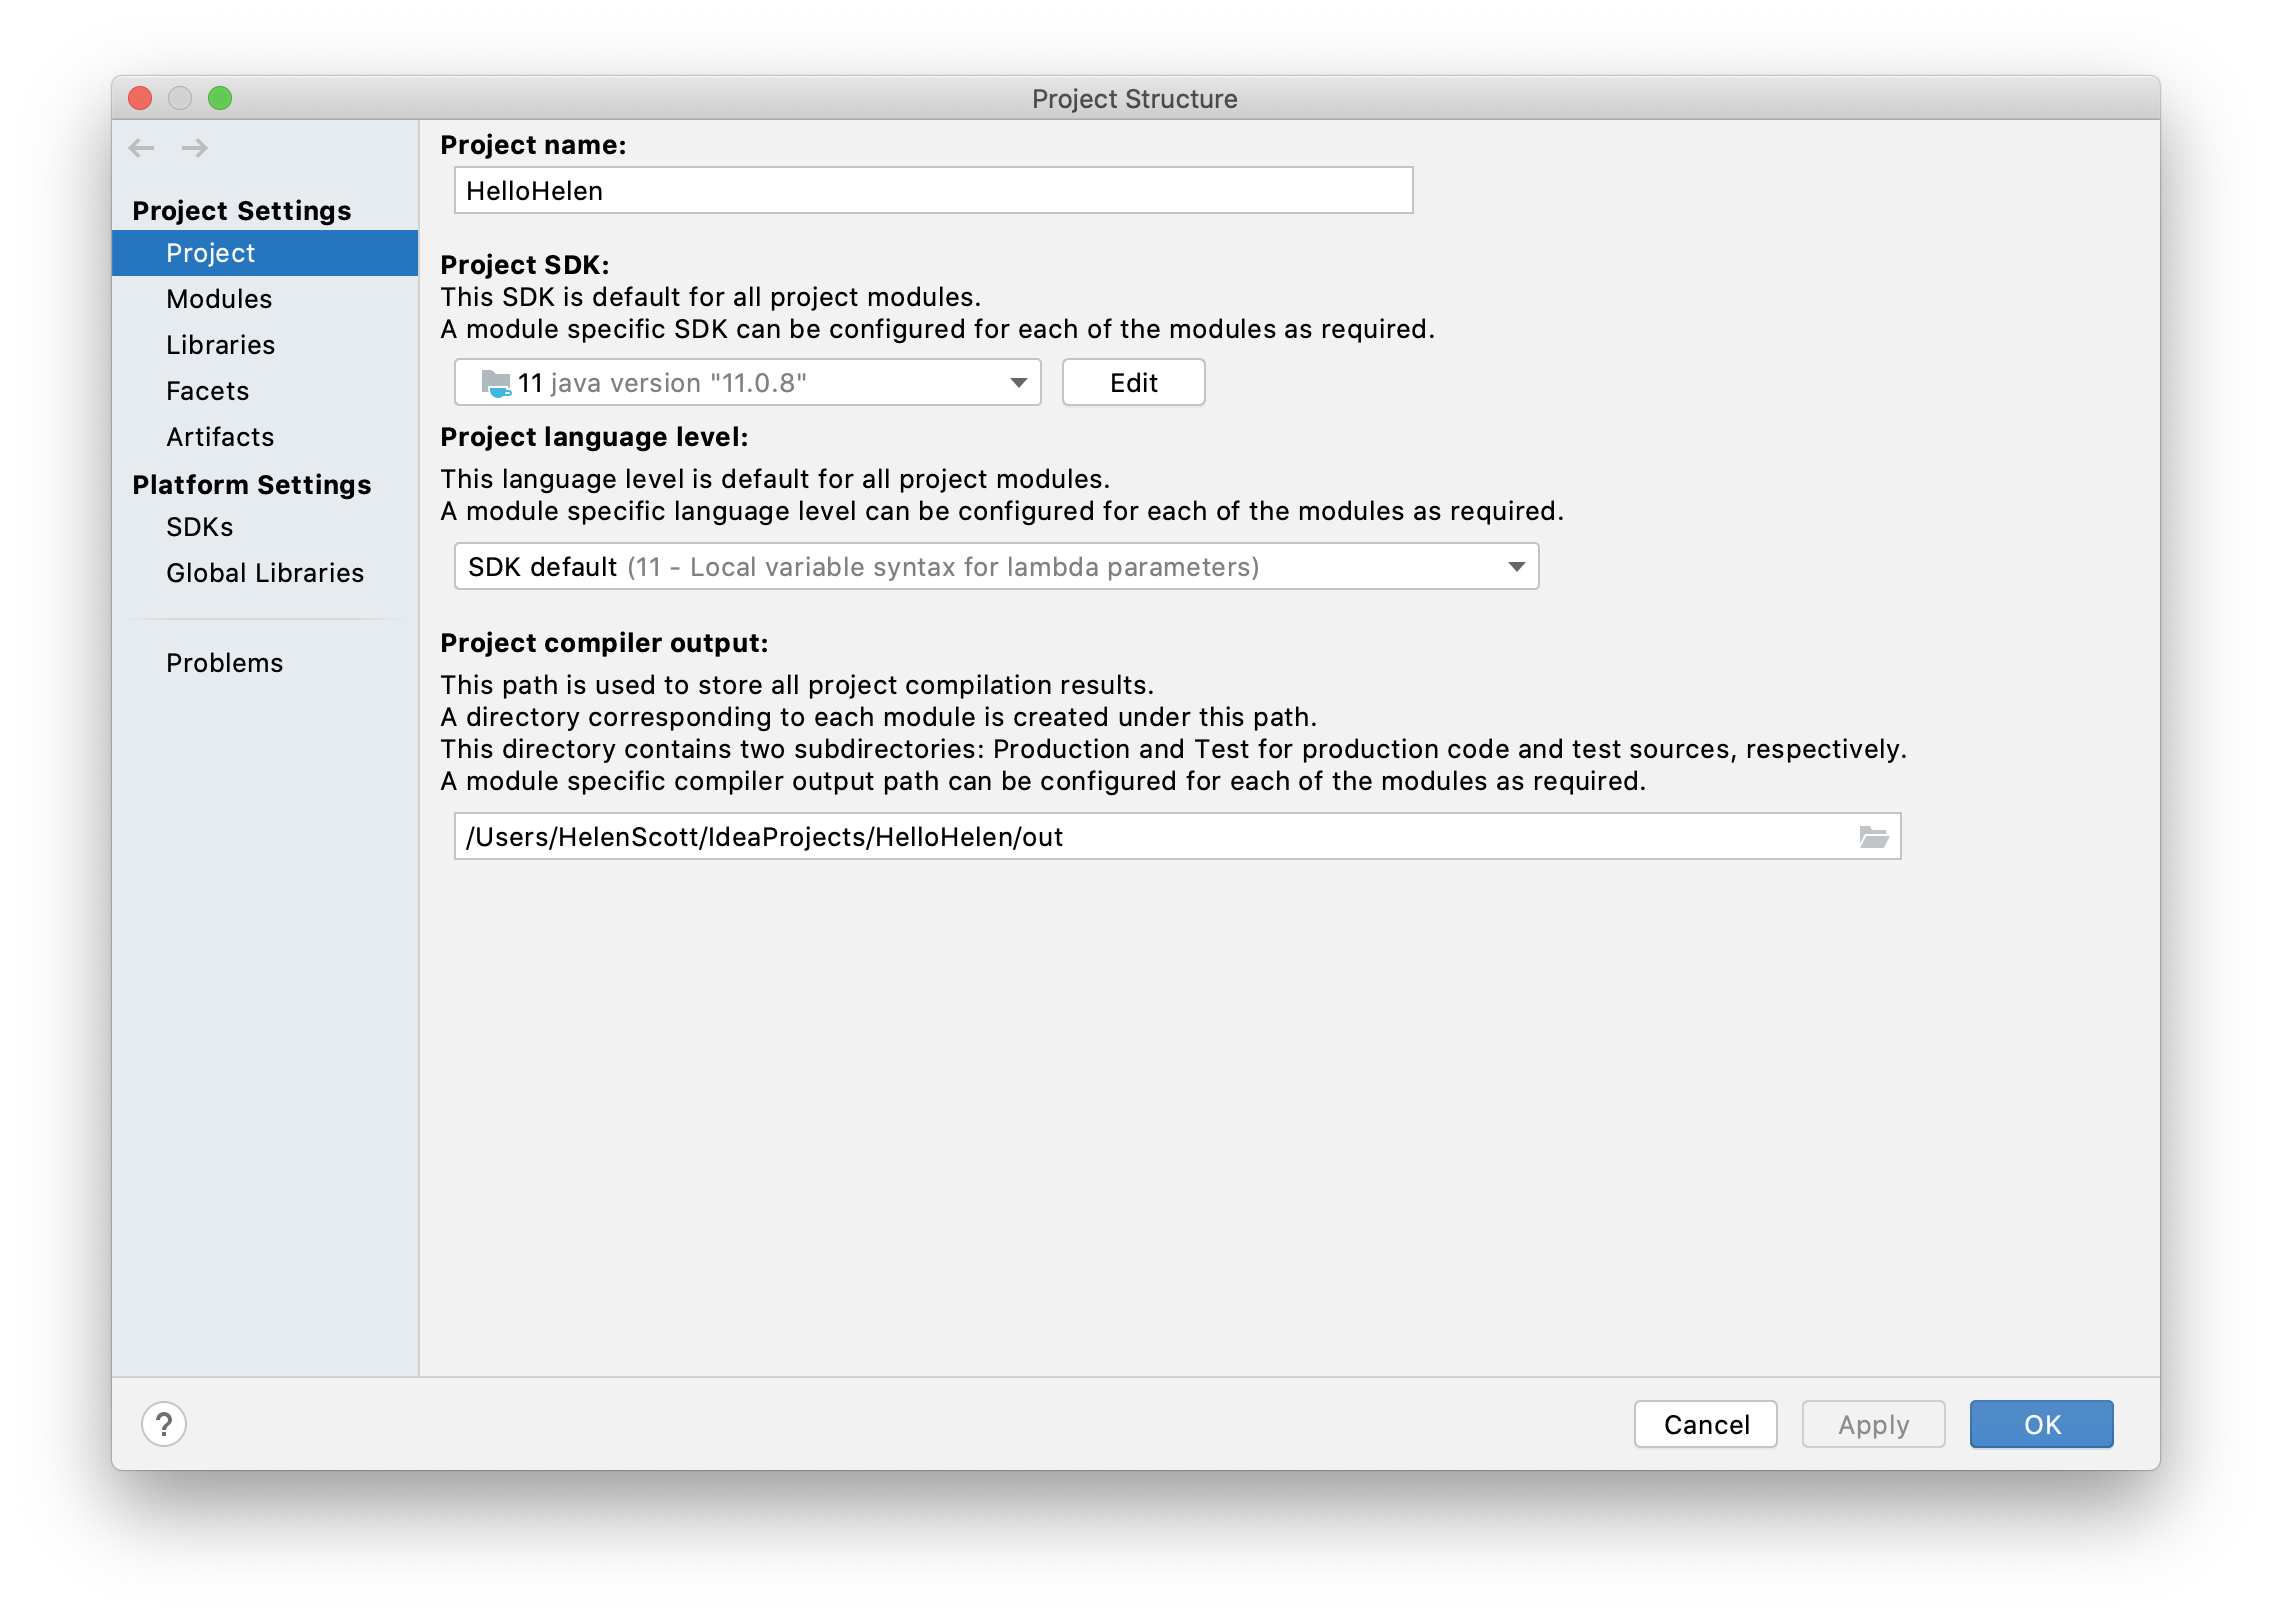
The product was in its infancy back then but I’m going to describe the modern-day experience! Let’s start at the beginning, you need the Navigation Bar on to access Code With Me. By the way I’m using the new UI in IntelliJ IDEA because I prefer it. If you haven’t enabled it yet you can do so in IntelliJ IDEA 2022.3 by going to your Settings/Preferences and then searching for “new UI” and enabling it. You’ll need to restart your IDE but then you’ll go from this:

Old Navigation Bar in IntelliJ IDEA

… to this! 

New Navigation Bar in IntelliJ IDEA

However, whatever UI you’re using, the most important icon for today is the Code With Me one:

Code With Me Icon

When you click this, you have three options. We will come back to Start Session in a moment. Permissions allows you to change the permissions that a new session starts with and gives you a finer level of control over what those joining your IDE session can, and of course, can’t do. 

Join Session allows you to join another IDE Code With Me session from your full IDE. It’s worth mentioning again that you don’t need to use your IDE to join someone else’s CWM session, but the option is there.

Back to Start Session, this does exactly what you’d expect. It allows you to initiate a new Code With Me Session, tweak the permissions you want to assign those connecting to your IDE and creates a custom link that you can share with people you want to invite to collaborate. The permissions are grouped into Read-only, Edit Files, Full Access and Custom. For each of these levels you can further define them at a lower level if you want to. For example, I can select Edit Files but then also give them access to run and debug functionality, whereas this is disabled by default with the Edit Files permission set.

Once you’ve settled on the permissions, you can click Start Session. IntelliJ IDEA will copy the link to your clipboard and you can share it with others. Here it is in action:

Once you’ve sent the link over to the people you want to join your session via Slack, JetBrains Space, MS Teams, Twist, Whatsapp, Signal, Telegram or Apple iMessage (did I get them all?) they can paste that link into their browser of choice to initiate the connection The recipient’s machine does not need to have the IDE installed, the guest’s JetBrains client connects to the host’s machine and you’ll be able to work inside their IntelliJ IDEA within the constraints of the permissions the host granted you when they created the Code With Me session.

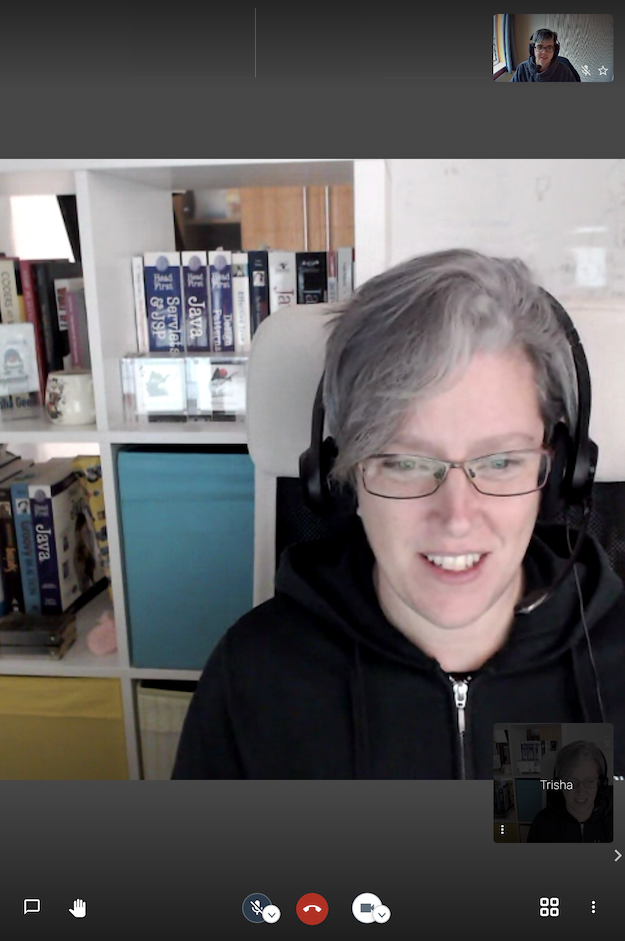
Trisha and I used Code With Me extensively throughout the creation of our book, Getting to Know IntelliJ IDEA. We loved the fact that you get code completion and the IntelliJ IDEA experience even without the full IDE. We also used the call feature extensively; be aware that Code With Me will mute your audio and turn off your video when anyone else joins the Code With Me session so don’t forget to renable them!

We naturally fell into the pattern of me being the driver and Trisha being the navigator. That meant that I, as the driver would fire up a Code With Me session and send the link over to Trisha, the navigator. However, because we were using Code With Me we weren’t constrainted to this model, we frequently reversed it and I did more talking while Trisha did the editing.

Here you can see the guest on the left and the host on the right-hand side:

Once you’re done collaborating, it’s worth knowing that changes from different authors go into different changelists. This is by design so you can see who has changed what, however, you must remember to drag changes from the contributors into one single changelist if you want to commit them all; IntelliJ IDEA does not allow you to commit multiple changelists (rightly)!

Finally you must close your Code With Me session when you’re finished collaborating. You can do that from the same Code With Me icon and then click End Session, otherwise your friend might come along and leave comments in your code that you weren’t expecting!

Trisha and I covered Code With Me along with lots of other features of IntelliJ IDEA in our book which you can buy directly from Leanpub

Getting to Know IntelliJ IDEA book cover

Getting to Know IntelliJ IDEA Book Launch!

On November 6th 2022, Trisha and I launched our book, Getting to Know IntelliJ IDEA. It’s taken us over two years to write, and it contains a wealth of information; in fact, it contains everything you need to get started using IntelliJ IDEA. We wrote the book because the tools we use matter, and being able to use them effectively improves our productivity and happiness. 

What’s in the book?

The book is over 350 tightly packed A4/US letter-sized pages. The eBook page count, of course, is much larger, at just under 1000 pages… That’s because there are plenty of:

…. annotated screenshots

Annotated screenshot from the book Getting to Know IntelliJ IDEA

… guided tutorials

Tutorial excerpt from the book Getting to Know IntelliJ IDEA

… helpful use cases

Helpful information from the book Getting to Know IntelliJ IDEA

… chapter introductions

Chapter introduction from the book Getting to Know IntelliJ IDEA

… chapter summaries

Bottom Line from the book Getting to Know IntelliJ IDEA

… and that’s before we get started on the Trisha Tips

Trisha Tip from the book Getting to Know IntelliJ IDEA

… and Helen Hints:

Helen Hint from the book Getting to Know IntelliJ IDEA

… plus much more!

How is the book structured?

The book is split into four parts, each of which has a different goal so that you can either read the book front to back, which I recommend if you’re new to IntelliJ IDEA, or you can dip in and out as you need to which more experienced users may want to do.


Part I lays the foundations of what IntelliJ IDEA is, what the key elements of the interface are, and how you can get the most from them. It also introduces the three guiding principles for IntelliJ IDEA:

  • Always Green – IntelliJ IDEA strives to keep your code compiling by flagging errors as they happen and assisting with keeping it syntactically correct.
  • Keyboard First – Using IntelliJ IDEA’s keyboard shortcuts speeds you up in your day-to-day tasks. You probably won’t learn them all, but learning the ones you use helps keep you focused.
  • In the Flow – We all know the feeling when you’re happily coding and don’t want distractions; we have provided lots of tips and tricks to help you stay in this zone while using IntelliJ IDEA.

Part II builds on the foundations laid in Part I for writing and reading code, which is a huge part of our daily jobs. It introduces some key features that help do the heavy lifting in IntelliJ IDEA so you can focus on doing what you do best – figuring out solutions to problems! There are many opportunities for you to try stuff out with the code snippets we have provided, which are all available on GitHub.


Part III takes it to the next level and uses guided tutorials to show you how to open, run, test, and debug real applications. These tutorials get you up and running quickly and introduce you to IntelliJ IDEA’s features so you can explore them at your own pace. Part III also discusses working with dependencies, build tools and version control; central components for real-world applications.


Part IV is where the book pivots to specific functionality you can use in your day-to-day workflow. This is where you can discover areas of IntelliJ IDEA that you might not be familiar with. We’ve included many features that can support you and introduced the “Frequently Asked Questions” element to answer your questions. The Table of Contents gives you clues as to what’s in here!

Header 1 Header 2 Header 3
IntelliJ IDEA essentials

Fixing errors and warnings

Refactoring your code

Formatting and rearranging your code Benefiting from multiple clipboards Using Run configurations effectively
Diving into debugging Expanding on testing Building on build tools
Doing more with dependencies Making version control work for you Viewing and applying local history
Running commands in the terminal Managing work todos Pairing with code with me
Working with plugins Understanding Java in IntelliJ IDEA Looking in your .idea folder
Changing IntelliJ IDEA settings What to do when things go wrong  

Where do I find out more?

You can check out Getting to Know IntelliJ IDEA today and learn how to get the most from your IDE!

Header 1    


Five cool features in IntelliJ IDEA

Here are my top five cool features in IntelliJ IDEA. There are of course more than five, but that wouldn’t make a catchy blog title!

  • Management of JDKs
  • Code completion
  • On-demand error highlighting
  • Customization
  • Tight integration

#1 – Management of JDKs

IntelliJ IDEA does a fantastic job of managing your JDKs. You can download new JDKs and configure existing JDKs on your machine with IntelliJ IDEA. I created a tip for this on the IntelliJ IDEA Guide but the short version is – go to your Project Structure with ⌘; (macOS), or Ctrl+Alt+Shift+S (Windows/Linux), to view your Project Structure.

The SDK drop-down shows you all the JDKs that are configured for use with IntelliJ IDEA (assuming you’re using a Java project), then there is an option to Add SDK and finally, IntelliJ IDEA shows you a list of detected SDKs:

The top list outlined in orange is all the JDKs that I’ve configured for use with IntelliJ IDEA. The bottom list outlined in green is the detected SDK – that is all those on your machine that you’ve downloaded but are not yet being used by IntelliJ IDEA. The middle option, Add SDK, outlined in purple is where you can download a new JDK from different vendors to your machine by selecting Download JDK. You can also select JDK to browse to a JDK on your machine that exists but IntelliJ IDEA hasn’t detected. You can also download IntelliJ Platform Plugin SDKs and Android SDKs here.

When you select Download JDK you can choose your version and vendor and IntelliJ IDEA will download your chosen JDK and configure it with use with IntelliJ IDEA.

#2 – Code Completion

IntelliJ IDEA takes code completion to the next level. There’s Basic Completion, Advanced Completion, Live Templates, Postfix Completion, Statement Completion and more.

Here’s a whirlwind tour for you! Basic completion usually is available by default, but you can also invoke it with ⌃␣ (macOS), or Ctrl+Space (Windows/Linux). Smart completion or type-matching completion is similar to basic completion, but it only shows options for the current context. You can invoke smart completion with ⌃⇧␣ (macOS), or Ctrl+Shift+Space (Windows/Linux).

Live Templates are also a form of code completion that allow you to use abbreviations such as main that IntelliJ IDEA will convert to Java’s main method. There are dozens of live templates, and you can create your own!

Postfix completion is similar to live templates in some respects in that it also uses abbreviations but it helps you avoid backward caret jumps as you craft the code. It also allows you to manipulate existing code as you add the dot and then the abbreviation for the postfix completion you want to use, for example ifn for if null.

Finally, statement completion is one of my favourites because it adds the correct parentheses, braces, and semicolons to my code! The shortcut is ⇧⌘⏎ (macOS), Ctrl+Shift+Enter (Windows/Linux). This is just one you need to try out, granted three key presses is more than one semi-colon but it’s very helpful because it reduces errors in my code. I also find I can quickly use ⇧⏎ (macOS), or Shift+Enter (Windows/Linux) to create a new line – it’s just a syntactically pleasing combination!

#3 – On-Demand Error Highlighting

You can write code and see error highlighting in real-time in IntelliJ IDEA, no more waiting for the compiler; if your code isn’t going to compile, IntelliJ IDEA will tell you about it straight away. I prefer to fix errors as they happen, usually with Quick Intentions which is ⌥⏎ (macOS), Alt+Enter (Windows/Linux). IntelliJ IDEA helpfully gives you a little red light-bulb when there’s an error with your code:


Alternatively, you can use F2 to navigate to each error in your Project or use the Problems tool window which is ⌘6 (macOS), or Alt+6 (Windows/Linux) to get an overview of any problems across your project.

If you search the IntelliJ IDEA tip page for “quick intentions” it will give you a flavour of some of the ways it can help.

#4 – Customisation

I would be remiss if I didn’t mention how much I love being able to customise IntelliJ IDEA. Fortunately, it comes packed with sensible default options but equally allows you to customise these over time as you get more familiar with the product. Of course, I don’t use 95% of the customisations but the point is that I can and many people in the community do. That said, the 5% I do use makes my authoring experience a more enjoyable and productive one. The best way to get an idea of what IntelliJ IDEA is capable of in the customisation department is to go to your Settings/Preferences with ⌘, (macOS), or Ctrl+Alt+S (Windows/Linux). You can then browse and view the groupings on the left such as Appearance & Behavior and Editor. My favourites customisation are:

#5 – Tight Integration

I couldn’t come up with a better name for this one, but fundamentally it’s the integration part of the IDE. It’s easy to take this part for granted because IntelliJ IDEA makes it look easy, however integration with tools such as Git, Maven, Gradle, Docker and more in both IntelliJ IDEA Community Edition and IntelliJ IDEA Ultimate.

Having a one-stop shop for all your coding needs really is a productivity boost, plus there’s no more faffing about configuring external tools to work with your coding tool because it’s all neatly integrated!

Pairing, but not as you know it

We’ve all heard of the benefits of pairing when it comes to coding, many of us have done it in our jobs and reaped the rewards, but have you ever paired to write English?

code-with-me.png

The agreement

Last week I suggested that we, Trisha Gee and I, do exactly that. We were both struggling to get into the zone of some written content that needed creating, and I’ve always wanted to try pairing on writing. I’ve benefited myself from pairing on code and, as a sole technical writer in the past, I’ve watched with envy as developers paired on their deliverables as I cracked on with me, myself and I for collaboration. Trisha agreed that we could try it so here’s the honest account of how pair-writing went, and what I learned.

We set aside two hours for the process. We were writing the content in IntelliJ IDEA, so we opted to use the new Code With Me functionality, so we could share our session in real-time with audio and video for the full 2021 remote-pairing experience. First up, we installed the plugin (currently experimental) and then we joined the Code With Me video call.

We spent a few minutes messing about with Code With Me, working out what we could and couldn’t do and then Trisha talked me through the pairing model of a driver and a navigator. In this model, one person drives (types) and one person navigates (thinks and talks). At this point, we both agreed I would drive, and Trisha would navigate because she knew the subject well, and I can type pretty fast on a good day. With the roles assigned, I put on my racing helmet, got into my rally car, and strapped myself in. While I was amusing myself with my fantasy car world, Trisha was creating a Scratch file to dump notes in that she wanted to come back to as she was navigating us around the track.


The pairing

Okay, so, we’re off. I was quite nervous about how it would work given I had pushed for it, but I kept up with the musings from Trisha and adopted shorthand where necessary. I surprised myself at how few mistakes I made. I was keen to ensure that what I noted down would be legible and understandable because I would be using my notes to turn the content into customer-facing content later. If I couldn’t do that quickly and easily, then this whole process wouldn’t be worth it. It would still be useful in that we would know that pair-writing doesn’t work, but that would be about it.

I kept an eye on the clock, and I think we were probably chatting for about 35 minutes in total. We were rudely interrupted by a phone call from my solicitor, which I had to take to try and keep my impending (and exceedingly stressful) house move on track. That is the point that we pulled off the race track. I think I’m probably done with that analogy now.

Image by Dimitris Vetsikas from Pixabay


ooops.jpg

The mistake


Before we finished the pairing session, Trisha was keen to get some inline code working that was being pulled in from another project. She talked me through how to add an attribute for the Asciidoc Plugin so that the code would be pulled in. Unfortunately, it didn’t work, so, after much discussion and bemusement, we decided that the experimental Code With Me plugin might be the problem.

We left that call and hopped on a different video call to troubleshoot. It’s entirely possible that Code With Me was not in any way the problem, and the problem was that the code I was trying to grab hadn’t been pushed, but we’ll just leave that one there!

Image by Craig Steffan from Pixabay


keyboard.jpg

The write-up

Skip ahead three days, and it was time to write up the notes from the pairing session. I was apprehensive because I was worried I wouldn’t understand my notes, but I was pleasantly surprised! Of course with a typical code pairing session, you wouldn’t walk away from it with half-baked, non-compiling code, but I was hopeful that my brain could make the notes I’d written previously into effective content; the equivalent of compiling code.

The first thing I did was commit the notes from the pairing session locally. Yes, I could have just deleted them and then used IntelliJ IDEA’s Local History, but I thought I’d go down the commit route for posterity and longer-term tracking. Once I’d committed it, I started hacking up the content. I went paragraph by paragraph reworking my driver notes into useful pros. It took me 30 minutes on the dot. I committed the updated topic and felt extremely pleased with myself. It had worked!

Image by Daniel Agrelo from Pixabay


wine-cheese.jpg

The learnings

It’s not just wine and cheese that go exceptionally well together as it turns out! Pairing works for writing too! In fact, it works really well. If you have one person who knows a lot about the subject they might make a great navigator (not exclusively).

You don’t need to have the same experience, or even the same job role, to pair on something; I recommend you try it. I wish I’d done more of this as a Technical Writer, I think it would have been very successful in a number of professional situations where I needed to create the content and didn’t (yet) have much subject knowledge. I will certainly be doing more of it now!

Image by Oldiefan from Pixabay


Generating Code with IntelliJ IDEA

One of the super cool things about IntelliJ IDEA is how much code you can generate with minimum effort. Yes, it’s not the 1990s anymore, we’re no longer measured on how many lines of code we generate (thankfully), but you also know that Java has its fair share of boilerplate code.

Well, there’s a shortcut in IntelliJ IDEA that generates a lot of code for you:

  • ⌘N on macOS

  • Alt+Ins on Windows and Linux

These shortcuts load the Generate menu! Here’s a quick tour of where you can use it in Java projects in IntelliJ IDEA. It’s not a complete list; let me know where else we can use it please!

New Java Class

In the Project Window, you can use this shortcut to create a whole host of things which are project and folder specific. If you use the shortcut on your directory that is marked as your sources root (usually src) in a Java project you get the option to create a new Java file (among other things). You’re then asked to select between a Class, Interface, Record (Preview), Enum or Annotation. It’s a speedy way of creating new classes for your project.

Before we move on, a closely related shortcut is the one we use for a new Scratch File. It’s ⌘⇧N on macOS, or Ctrl+Shift+Alt+Ins on Windows/Linux. You can select to create a new Scratch file using ⌘N on macOS, or Alt+Ins on Windows and Linux in the Project Tool window, but it’s worth committing the scratch file shortcut to memory too as it’s handy to be able to dump some code or notes in an area outside your project and share it across IntelliJ IDEA projects.

Constructors

Now that you’ve got your class, you may want to generate a constructor or two. However, before we do that, let’s add a couple of variables to our class:

public class GenerateCode {
   private final String name = "Helen";
   private int age;
   private String mood;
}

We can use the same shortcut to make ourselves a constructor. We get some options here because we’ve got some fields in our class:

generate-constructor.png

IntelliJ IDEA is asking us if we want to pass our fields into our Constructor.

If we select both and click OK we have our Constructor with the parameters passed in.

public class GenerateCode {
   private final String name = "Helen";
   private int age;
   private String mood;

   public GenerateCode(int age, String mood) {
       this.age = age;
       this.mood = mood;
   }
}

Other Class-Based Generate Options

We don’t need to stop there either. There’s a whole host of code that IntelliJ IDEA can generate for us at this stage including:

  • Getter

  • Setter

  • Getter and Setter

  • equals() and hashCode()

  • toString()

  • Override Methods

  • Delegate Methods

  • Test

While we’re here, Java Records are coming and IntelliJ IDEA is ready. Another way you could generate code if you’re not ready to move to Java Records is to use the Generate shortcut to create a new Java record, and then you can convert the Java record to a normal Java class with ⌥⏎ on macOS, or Alt+Enter on Windows and Linux with your caret on the class name.

Implement Methods

When our Java class implements an interface, we need to ensure that we implement that interface’s methods. The Generate menu helps us here too. Let’s say that our code looks like this, and we’re implementing NewInterface:

public class GenerateCode implements NewInterface {
   private final String name = "Helen";
   private int age;
   private String mood;
}

When we use ⌘N on macOS, or Alt+Ins on Windows and Linux this time, we see select a new option call Implement Methods:

implement-methods.png

The keyboard shortcut is ⌃I on macOS, or Ctrl+I on Windows/Linux.

This allows you to generate the code required to implement the methods in the Java interface that we’re implementing with the @Override annotation.

Now IntelliJ IDEA has generated that code for us:

public class GenerateCode implements NewInterface {
   private final String name = "Helen";
   private int age;
   private String mood;

   @Override
   public void doSomething() {
   }

   @Override
   public void goSomewhere() {
   }
}

This also works for overriding methods from superclasses/super abstract classes. 

Add Parameters / Arguments

Another useful trick you so is to use ⌘N on macOS, or Alt+Ins on Windows and Linux when you’re in a dialogue, and you need to add more rows or data. For example, we added a default constructor to our class, but we now want to refactor it to change the signature. Our code currently reflects the default constructor:

public class GenerateCode{
   private final String name = "Helen";
   private int age;
   private String mood;

   public GenerateCode() {
   }
}

Let’s refactor the Constructor with ⌘F6 on macOS, or Ctrl+F6 on Windows/Linux. In the Change Signature dialogue, you can use ⌘N on macOS, or Alt+Ins on Windows/Linux to add a new parameter. This saves you using your mouse to click the little + icon.

This trick works in all the dialogue boxes that require additional lines to be added that I’ve found so far.

Generate Test Methods

Finally, everyone loves a good test and rightly so. We’ve already mentioned that you can use the Generate menu from a Java method to generate a corresponding test class. However, once you’re in the test class, you can use ⌘N on macOS, or Alt+Ins on Windows and Linux again to create much of the boilerplate code you might need, including (for JUnit5 at least):

  • Test Method

  • SetUp Method

  • TearDown Method

  • BeforeClass Method

  • AfterClass Method

If you are working with a different testing framework, your Generate menu will give you other relevant options.

Summary

Java may be a little clunky on the boilerplate side of things, but IntelliJ IDEA takes the heavy lifting out of that to a large extent so along with the shorcut for intention actions, it’s a compelling combination.

IntelliJ IDEA Made me Lazy

cat-2360863_640.jpg

I haven’t always been lazy; it’s a fairly recent addition to my repertoire of skills. And do you know who I blame? I blame IntelliJ IDEA. I used to check that I’d completed a statement correctly, I used to look at javadoc, I used to check I’d closed my parentheses correctly, but now I don’t give things a second glance.

Image by photosforyou from Pixabay

It’s all IntelliJ IDEA’s Fault

No, really, it is. Back when I was a (cough) younger adult, we had to type out all the code, we also thought it was cool to mix drinks that turned into something akin to gorilla snot. Maybe we weren’t that smart, but I am discovering one thing at a rapid rate, IntelliJ IDEA was smarter than me, even 20 years ago (I’d like to say it was a low bar).

I took a long break from coding, about 20 years, in fact. When I left coding, I wrote code in Vi and had memorised that very useful shortcut :wq. IDE’s were around, but in fledgeling forms. Recently I came back to coding, and I walked straight into IntelliJ IDEA’s open arms.

Exhitbit 1 – Statement Completion

Never one to take responsibility for my own actions, I’d like to offer up exhibit one – Statement Completion in IntelliJ IDEA. When you use the combination of Cmd+Shift+Enter, on macOS or Ctrl+Shift+Enter on Windows/Linux, IntelliJ IDEA completes it for you so that it will compile. I don’t even know where the semi-colon button is on my keyboard anymore; I don’t need it. Allow me to demonstrate.

Try this one.

Rubbish right? Naturally, it won’t compile.

auto-complete-statement-post.png

Use Statement Complete and boom, we get this.

IntelliJ IDEA is kind and pops the caret in the right place as part of Statement Complete too. Sure, it’s only a few characters, but there’s a deep-seated comfort in knowing IntelliJ IDEA made it compile. It might not do what you want yet, but that’s your problem, mostly. I recommend you train your fingers to master this one, it will help you sleep at night.

statement-complete-presentation-mode.png

Exhibit 2 – Live Templates

I covered these in detail in this blog, but here’s a quick recap.

for-live-template-pre.png

Remember the days when you had to type the whole `for i` loop out? Well, they’re as dead as the shell-suit fashion of the 1990s.

for-live-template-post.png

After we press return, the Live Template in IntelliJ IDEA does all the boring stuff for us.

Incidentally, you should press Tab to move to the next point that needs your input (the red squiggle).

A few more of my favourites are:

psfs will give you public static final String

And

soutv (in a fori loop will give you System.out.println("i = " + i);)

There's 35 more for you to check out with your beverage of choice! There's no keyboard shortcut for Live Templates; they'll just appear when you summon them by starting to type what you want.

Exhibit 3 – Post-Fix Completion

It seems like the humble dot is extremely powerful in IntelliJ IDEA. It does Basic Completion automatically, but, it also does something very cool in that it can be used to tell IntelliJ IDEA to wrap whatever you just typed in some more code.

We’re just mere humans, we obey the laws of the languages we speak and write (mostly), but thinking is hard. Allow me to demonstrate. We don’t think:

  1. I want to output some text to the console.

  2. I want to write some text.

No. We think:

  1. I want to write some text.
  2. Oh, also, I want to output that text to the console.

This is exactly what Post-Fix Completion does. It builds on live templates, where applicable, and helps your brain to flow in the order of things that it’s probably become accustomed to over the years (many in my case).

Before post-fix completion, the earlier example becomes:

  1. I want to Output some text to the console

    sout.-> System.out.println();

  1. And then I want to write the text to output

    "I wandered lonely as a cloud"

But, with post-fix completion:

  1. I want to write some text.

    "I wandered lonely as a cloud"

  1. Oh, also, I want to output that text to the console

    .sout -> System.out.println("I wandered lonely as a cloud");

There are 46 types of Post-Fix Completion in IntelliJ IDEA 2020.2. That’s a lot of time saved in your day and a lot of language-based syntactic-sugar for your thinking-brain. Other cool examples include:

assert to create an assertion based on a boolean expression, for example:
is2020OverYet.assert

Becomes

assert value;

My favourite code construct, the humble for (and fori loops):

String[] monthsLeftIn2020 = {"November", "December"}
monthsLeftIn2020.for

Becomes

String[] monthsLeftIn2020 = {"November", "December"};
for (String months : monthsLeftIn2020) {

}

Lastly, this one is pretty cool. I like var and this is one way that IntelliJ IDEA takes the notion of var to make your life just a little easier. You can use .var to ask IntelliJ IDEA to declare something that you’ve created as the correct explicit variable type. Let’s look at the String.var portion of this:

void speed2020Up(Magic magic) {
   magic instanceof String.var
}

Using .var asks IntelliJ IDEA to put the variable type in for us, it’s a boolean because that’s what instanceof returns.

void speed2020Up(Magic magic) {
   boolean b = magic instanceof String;
}

You will also have the option to use the var type for real at this point if you want to. Now, var is fabulous, but Java is still a statically typed language. If you, as a human-being (presumably), can’t figure out what type it is, please don’t use var as the variable type. Using .var is geat, but declaring something as type var is a big no-no if the type of the expression is not quickly decipherable. Gift your fellow humans (right now, we all need it) by stating the type that it evaluates to when all is said and done. They’ll thank you for it and you’ll help them sleep better at night.

Exhibit 4 – Smart Completion

With IntelliJ IDEA you get Basic Completion out of the box, but Smart Completion is just an extra finger tap away by using Ctrl+Shift+Space. Smart Completion not only analyses what could be correct, but it takes it one step further and looks at the context of the surrounding code to make the right decision. If IntelliJ IDEA can determine the appropriate type for the right-hand side of an assignment statement, initiating a variable, a return statement, arguments of a method call and more, it will filter the list to just that. To show you the power of Smart Completion, I’ll show it to you alongside basic completion for comparison.

First up, we’ll invoke Basic Completion (no ‘dot’ so it won’t come up automatically in this case). Note that I have a space after new.

HashMap hashMap = new

basic-completion-hashmap.png

With basic completion we get a whole list of options, some valid, some not so much.

smart-completion-hashmap.png

But, with Smart Completion, we get a much shorter, more relevant list.

Okay, let’s look at a return statement next.

basic-completion-return-statement.png

With basic completion.

smart-completion-return-statement.png

And with smart completion.

You get the idea, it's very useful! Here is the keyboard shortcut that you need:

smart-completion-shortcuts.png

Did Your IDE Make You Lazy Too?

There’s a lot of advantages to being lazy. It affords you more time for yourself, and your loved ones for a start. However, it’s more than that, being a developer isn’t all about writing code; there’s also:

  • Thinking / flow time
  • Working out what your code needs to do
  • Asking questions / Answering questions
  • Mentoring others / Being mentored yourself
  • So much more!

Being lazy isn’t a bad thing, it’s an efficiency gain that allows me to focus on the things that matter, which isn’t checking my parentheses are correct or remembering to put a semi-colon after my statement. No, it’s taking time for myself and those around me. Sure, it’s IntelliJ IDEA’s fault, but I am happy that we’re here!

Live Templates in IntelliJ IDEA

Okay, I did the math. If you use all 38 of the Live Templates for Java that are available out of the box in IntelliJ IDEA 2020.2, you will save your finger pads approximately 2092 presses of wear and tear, and that’s just each one once, the reality is likely to be substantially higher. I will caveat this by saying that I counted the unresolved variables, yours may be longer or shorter. Still, it’s impressive!

What are Live Templates?

Java has had its fair share of grief over boilerplate code and verbosity. You could type it out manually (boring), switch to Kotlin (it’s an option), or take a look at using IntelliJ IDEA to save you both time and effort.

When I first came across the notion of Live Templates, I couldn’t figure out what was ‘live’ about them. Did they need feeding or something? It seems to be an industry-standard term, so I’m no longer devoting much energy to this quandary, but if you were wondering the same, you’re not alone.

There are lots of types of live templates in IntelliJ IDEA (38 in fact, as I mentioned). There’s the delightful four-finger taps `psvm` which will expand to 39 finger taps of:

public-static-void-main.png

And another of my favourites, also four-finger taps, is `sout` which expands to 20 finger taps:

system-out-println.png

The Live Templates even determine where the caret appears, which is why screenshots are useful here. There are lots of these ‘non-variable’ Live Templates. They’re quick to use and will quickly embed themselves in your muscle memory. You’ll wonder how you ever wrote:

public static final String

… instead of psfs

However, that’s not all live templates can do; they can also help you with something called ‘parameterised templates’ with variables that you can manipulate.

For example, fori gives you a rather lovely for loop template (29 finger taps):

for-loop-clean.png

By default, IntelliJ IDEA will put the caret on the first instance of i, and this is so you can change it to your preferred variable if required. If you then hit tab, the editor will jump you to the user input part between the less-than symbol and the semi-colon. Tab again will drop you into the body of the loop so you can step away from those arrow keys.

Other live templates for user input constructs include itar to iterate over elements of an array, itco to iterate over elements of a Collection as well as may other iteration operations. lazy is another win, quite literally, to perform a lazy initialisation.

Identifying a Live Template

IntelliJ IDEA is always trying to be helpful. One thing I struggled with was working out what was what when I was typing code. You can spot a live template from the lack of parenthesis and a helpful description. For example, the last four here are live templates, but only one is strictly from Java – fori.

live-template-list.png

Poking around Live Templates

You can take a look at Live Templates from your Preferences using ⌘, on macOS and Ctrl+Alt+S on Windows and Linux then start typing in Live Templates. You’ll see the list split by language. You can have a dig around in here until your heart’s content turning them off (and on again). I found it interesting to check out not only what Java Live Templates there were but also the Live Templates available in the other languages.

Making/Editing/Duplicating a Live Template

Manipulating Live Templates is easy to do in IntelliJ IDEA. As above, find your Live Templates in Preferences and then click this little plus icon:

If you want to duplicate one instead, use the icon a bit further down that looks like paste clipboard.

When you select 1. Live template you can then enter a keyboard abbreviation, a description, and the text that will form your live template.

Live Templates are very flexible in their creation, so here’s a couple of callouts. Firstly, know and use variables wisely. I found these a little bit confusing at first glance, but this documentation removes the mystery nicely and explains what each one does.

Let’s walk through the fori Live Template to see how it breaks down:

for-i-live-template.png

When we use it in a Java class we get this:

for-i-empty.png

How does that work then? Looking back at the Live Template definition, we can see the Edit Variables button. Clicking it yields this information:

edit-template-variables.png

This tells us that the variable $INDEX$ is defined as suggestIndexName() which we can see from the page I pointed you to earlier is defined as:

So $INDEX$ becomes i when we use the Live Template. $LIMIT$ didn’t get a definition in the Live Template so when it’s used in a Java class, that’s where the tab lands for the user to enter a value.

If you leave the value blank, the user can tab to it when the Live Template is used and enter their preferred value, as we saw in the fori example earlier.

Secondly, define your context carefully; this is where the Live Template will be available for use. For example, these are the available Java contexts:

java-contexts.png

Our fori example has a context of Statement which makes sense for a for loop:

for-i-context.png

Now you can go forth and create all the Live Templates that your heart desires and save even more finger taps!

How to Feel Good (about Live Templates)

It’s 2020, to be honest, we all need a little extra help with that warm fuzzy feeling this year. I found this thing called Productivity Guide in IntelliJ IDEA. It doesn’t just cover Live Templates; it covers everything that IntelliJ IDEA does to save your finger pads from wear and tear. Mine is pretty feeble because I have to reset my environment multiple times for various screencasts and stuff. I bet your IntelliJ IDEA statistics are substantially more impressive!

New to IntelliJ IDEA? Me Too.

Until recently, I last wrote Java in anger in 2002. IntelliJ IDEA had just been released; it wasn’t remotely on my radar. I honestly can’t remember what IDE we were using back then, but it certainly was a very long way to the fully featured IDE that JetBrains produce today. Here’s my experience of using IntelliJ IDEA for the first time.

Downloading IntelliJ IDEA

There’s a lot going on when you first load IntelliJ IDEA, but I learned pretty quickly that there are also some good first steps you can take to make your experience a little more comfortable. The first thing I would say is that it’s an enterprise tool so there is a learning curve. There’s no getting around that – it’s the same with any new piece of enterprise software; you do need to give it some time and be willing to go on a learning journey. Fortunately for us, JetBrains have, in my opinion, done a very good job at supporting developers on that learning curve. So, if you’re sitting comfortably, here are my recommendations.

  1. Figure out which version of IntelliJ IDEA you need. I once offended my now-colleague Trisha Gee by asking her which IDE to use because I didn’t know that IntelliJ IDEA Community was free. Foolishly, I assumed that because it was an insanely powerful IDE that it couldn’t possibly be free. I was appropriately schooled by a rather irritated Trisha and told in no uncertain terms that I could use IntelliJ IDEA for FREE. Honestly? Mind blown. I then decided that there must be a catch, so I assumed (see a pattern here?) that it would only be free for me to muck about and not free for commercial development. Wrong again, Helen, wrong again.

  2. Next up, download JetBrains Toolbox, even if you’re only using IntelliJ IDEA. I promise you it’s worth it. This cute little box will sit on your toolbar, chill out and manage all the installs and updates to IntelliJ IDEA with minimal input from yourself. Use your new JetBrains toolbox to download the version of IntelliJ IDEA you require and manage your licensing requirements.

Okay, great! You’ve got a shiny version of IntelliJ IDEA downloaded. Let’s get started!

Running IntelliJ IDEA for the First Time

  1. You’ll be asked to choose between Darcula and Light for your UI theme. I am not getting into this argument. I like light, deal with it. Click Next: Default Plugins to move on (unless you’re in a rush in which case click Skip Remaining and Set Defaults). IntelliJ IDEA does a great job of selecting the plugins that you’re most likely to need – these are the Default plugins. You can disable some of them if you want to but if you’re not entirely sure just leave them because you can tinker with them later.

  2. Click Next: Featured plugins, this is a list of plugins that are the most common ones. Feel free to go rummaging around for plugins, but keep it real – the more plugins IntelliJ IDEA has, the more it has to deal with as well as being your awesome IDE. I recommend you build the plugins up so you get used to IntelliJ IDEA out-of-the-box-almost to start with. With that in mind, you should definitely go ahead and grab Key Promoter X and IDE Features Trainer if you’re new to IntelliJ IDEA (which you probably are given you’re reading this)! Now click Start Using IntelliJ.

Little note here, if you screw up your settings and want to unwrap IntelliJ IDEA all over again, go to File > Manage IDE Settings > Restore Default Settings. This is relatively new and can be a very useful learning experience. 

Starting a New Project in IntelliJ IDEA

  1. I’m going to go ahead and start a new project. Here’s where we need to sort our Java version out. IntelliJ IDEA is pretty smart about this. It will go and look for the Java versions you’ve already got installed, if there are any. If it finds them, it will populate the Project SDK with them. If it doesn’t find any it gives you an option to download them. You can select your Vendor and your Version and click Download. I recommend you leave the default Location because again, IntelliJ IDEA is smart and knows exactly where to look to find what it needs.

  2. You can select additional libraries here if you want to and you know what you want. I am going to leave them blank and click Next.

  3. Next up, we have Templates. You can create templates from existing projects to recreate later, however on new installations the only template available will be Command Line App. This is a boilerplate Java application with a class and a method. If you’re new to IntelliJ IDEA, it’s worth selecting this option just to get a feel for the file structure and inner workings.

  4. Go ahead and enter a Project name. The Project location will be constructed from the name although you can change it if required. If you want to change the Base package you can do but for now, I recommend you go ahead and click Finish.

And there you have it! One shiny new IntelliJ IDEA project!

A Note on the ‘Release Version’

If you’re anything like me, the first thing you do is throw caution to the wind and go change a bunch of settings in the IDE because you ‘know what you’re doing’. Well, turns out, I didn’t! So, word of warning – if you see this error, it means your ‘Project bytecode version’ is set to something higher than your ‘Project SDK’ (and thus Project language level)’:

Java release version not supported

Check your SDK setting by using ⌘; on macOS, or Ctrl+Alt+Shift+S on Windows/Linux and looking at your Project Settings > Project, specifically your Project SDK and Project Language Level values and make a note of them.

Project Structure

Next, check your Project Bytecode version by using ⌘, on macOS or Ctrl+Alt+S and search for Build, Execution, Deployment > Compiler > Java Compiler. Your Project bytecode setting needs to either be the same as your Project language level, or something lower than it, such as Java 11. Then you can rebuild the project.

Java Compiler Setting

Being new to IntelliJ IDEA, something else that I wondered was what’s the difference between the Project SDK and the Project language level. As it turns out, the Project SDK are the tools you need to develop Java (seems fair), whereas the Project Language Level refers to the assistance that IntelliJ IDEA will give you in the editor. The two settings can be different as well. Your Project language level will restrict what inspections IntelliJ IDEA applies to your code and determine which compiler is used to turn your Java code into bytecode. You can override the compiler settings as I showed above if you don’t want to compile your code with the Project Language Level.

Summary

I can remember hating getting my environment set up at university – and I screwed it up regularly too. There is absolutely no doubt that IntelliJ IDEA makes the whole process of running ‘HelloWorld.java’ a whole lot easier. It does a great job of obfuscating the settings until you need them and will hold your hand throughout the process of setting up your environment without you breaking into a sweat about your classpath setting. Yes, you can break it, but you can also fix it very easily.

The discussion of whether to use an IDE, or not, is one that polarises people. As someone returning to Java after a long period of absence, working with an IDE of this calibre is like having a really knowledgeable friend help you achieve your goal (to run HelloWorld.java) and just that, as quickly and as efficiently possible. I know I’m still scratching the surface of what IntelliJ IDEA can do, but I’m a huge fan of the right information at the right time (which is when I need it) and IntelliJ IDEA does this very well. I’m looking forward to finding out more!