
Here are my top five cool features in IntelliJ IDEA. There are of course more than five, but that wouldn’t make a catchy blog title!
- Management of JDKs
- Code completion
- On-demand error highlighting
- Customization
- Tight integration
#1 – Management of JDKs
IntelliJ IDEA does a fantastic job of managing your JDKs. You can download new JDKs and configure existing JDKs on your machine with IntelliJ IDEA. I created a tip for this on the IntelliJ IDEA Guide but the short version is – go to your Project Structure with ⌘; (macOS), or Ctrl+Alt+Shift+S (Windows/Linux), to view your Project Structure.
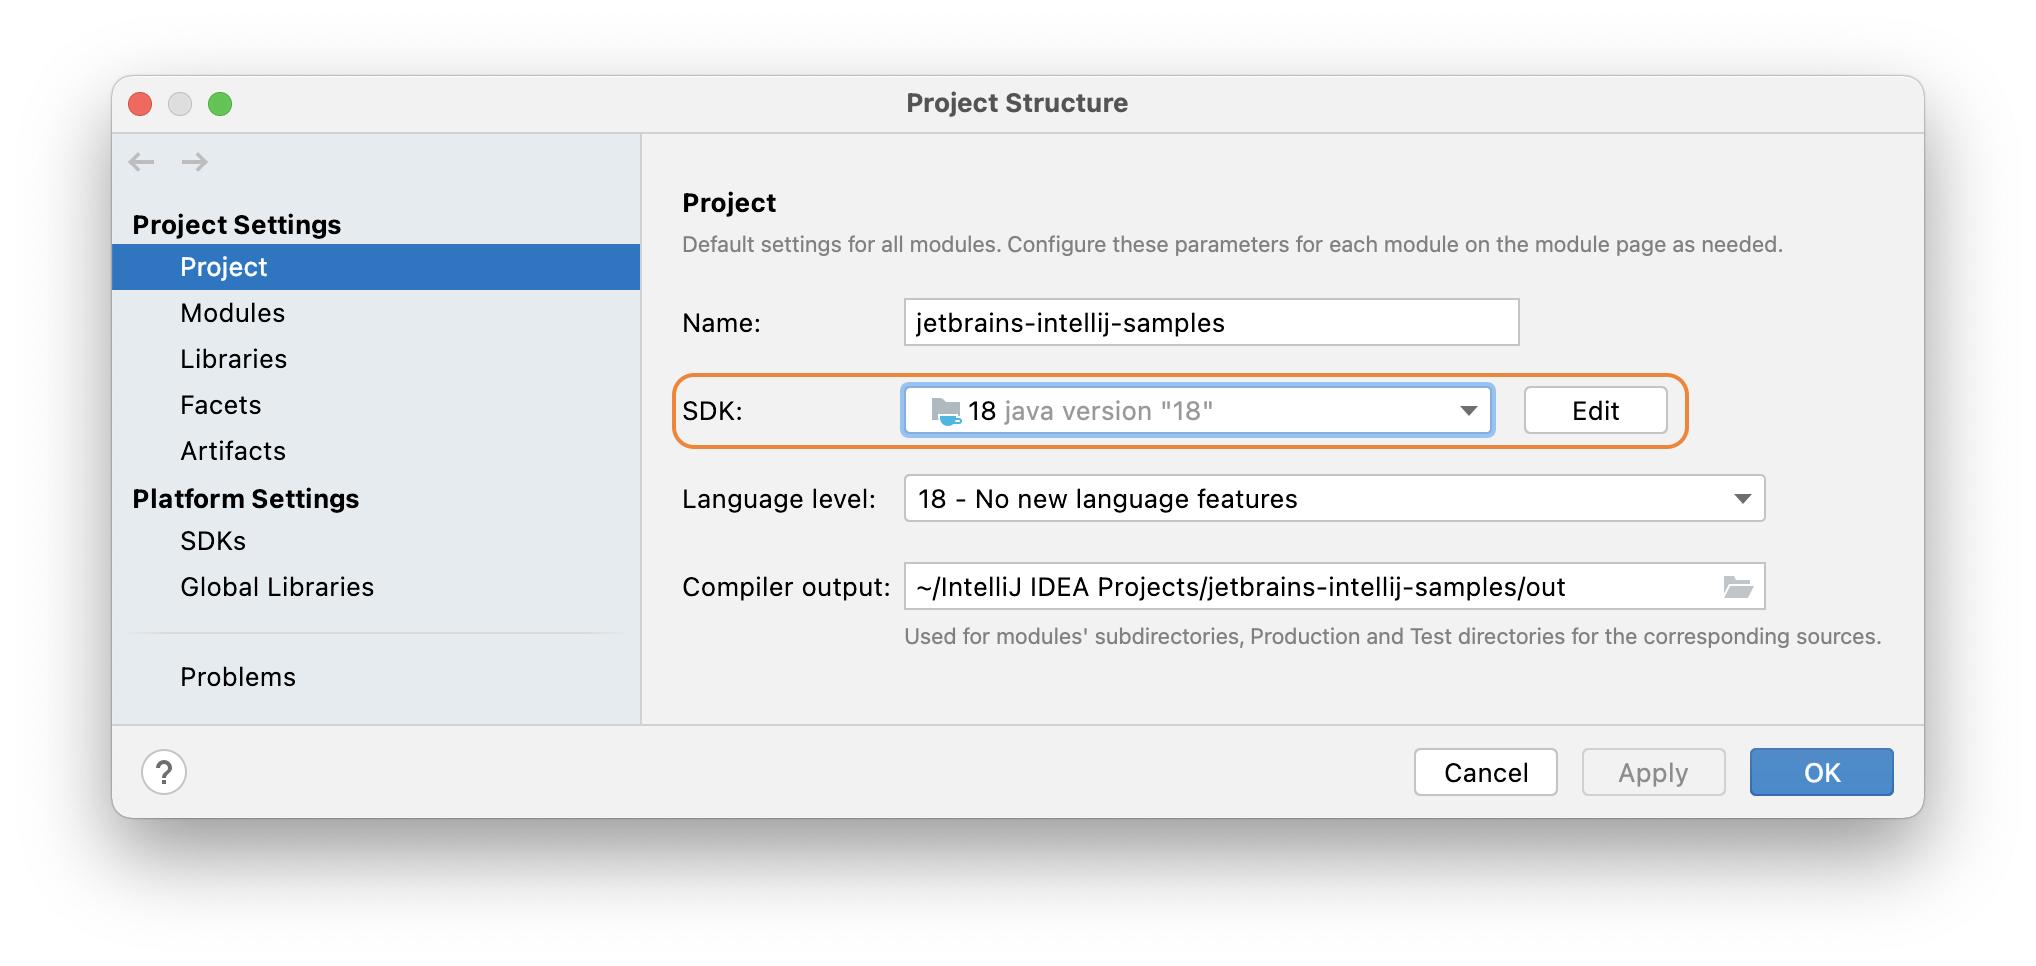
The SDK drop-down shows you all the JDKs that are configured for use with IntelliJ IDEA (assuming you’re using a Java project), then there is an option to Add SDK and finally, IntelliJ IDEA shows you a list of detected SDKs:
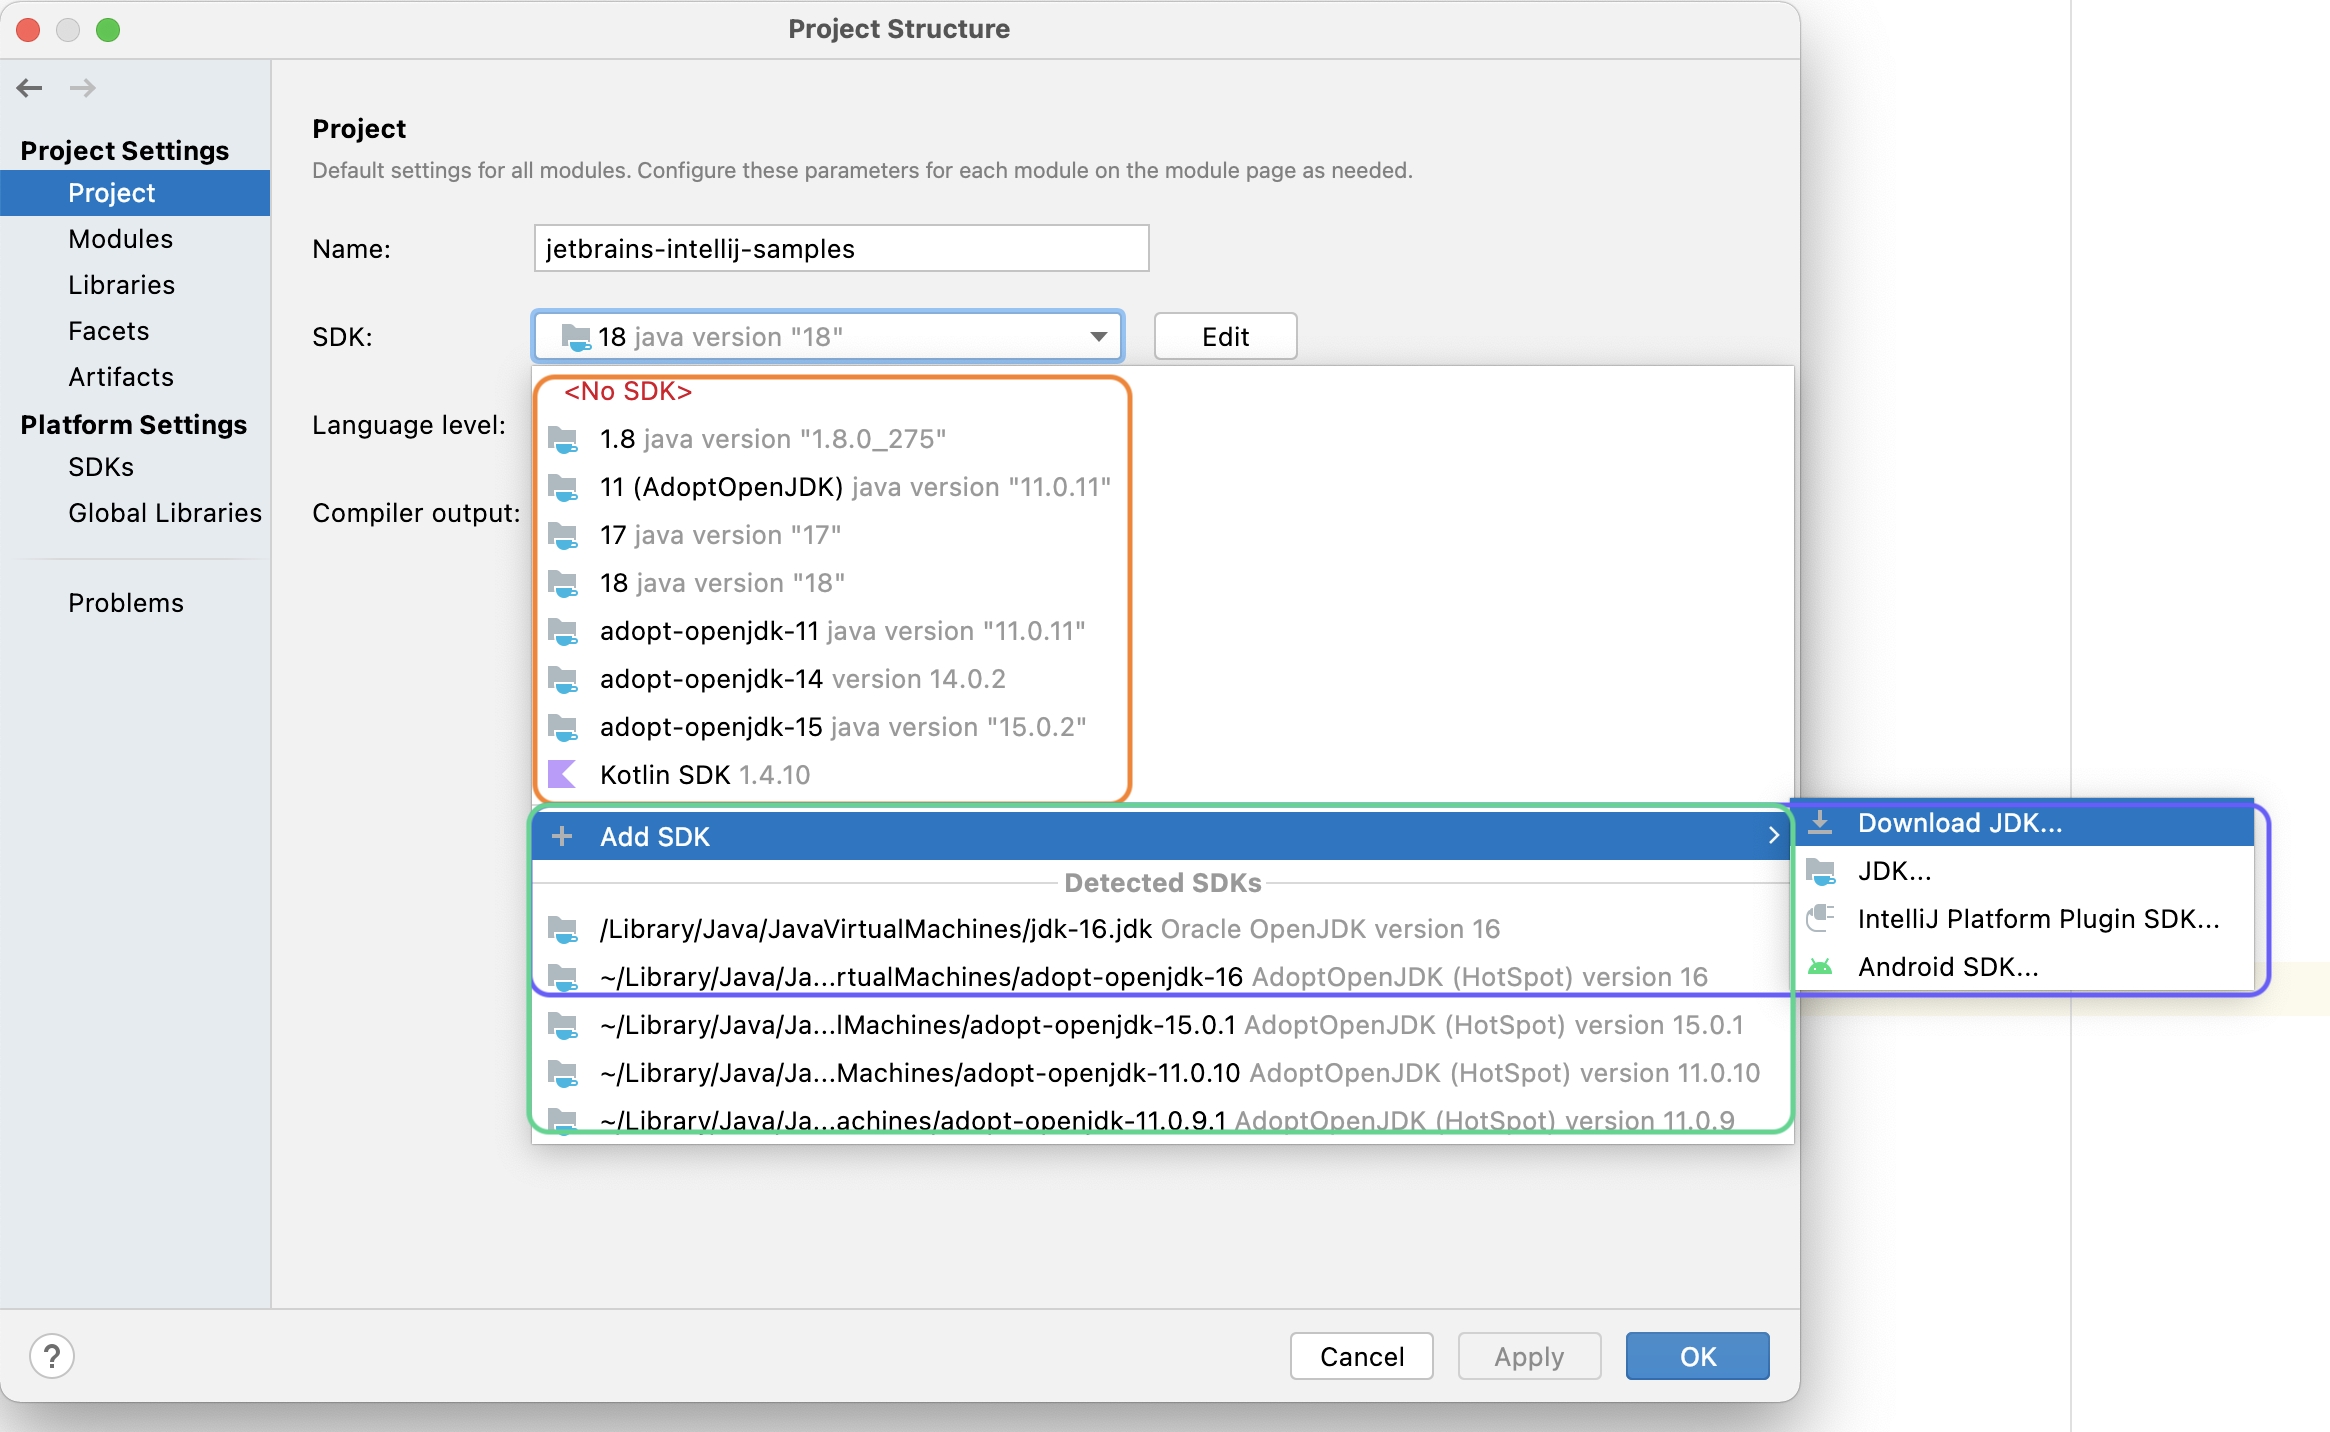
The top list outlined in orange is all the JDKs that I’ve configured for use with IntelliJ IDEA. The bottom list outlined in green is the detected SDK – that is all those on your machine that you’ve downloaded but are not yet being used by IntelliJ IDEA. The middle option, Add SDK, outlined in purple is where you can download a new JDK from different vendors to your machine by selecting Download JDK. You can also select JDK to browse to a JDK on your machine that exists but IntelliJ IDEA hasn’t detected. You can also download IntelliJ Platform Plugin SDKs and Android SDKs here.
When you select Download JDK you can choose your version and vendor and IntelliJ IDEA will download your chosen JDK and configure it with use with IntelliJ IDEA.
#2 – Code Completion
IntelliJ IDEA takes code completion to the next level. There’s Basic Completion, Advanced Completion, Live Templates, Postfix Completion, Statement Completion and more.
Here’s a whirlwind tour for you! Basic completion usually is available by default, but you can also invoke it with ⌃␣ (macOS), or Ctrl+Space (Windows/Linux). Smart completion or type-matching completion is similar to basic completion, but it only shows options for the current context. You can invoke smart completion with ⌃⇧␣ (macOS), or Ctrl+Shift+Space (Windows/Linux).
Live Templates are also a form of code completion that allow you to use abbreviations such as main that IntelliJ IDEA will convert to Java’s main method. There are dozens of live templates, and you can create your own!
Postfix completion is similar to live templates in some respects in that it also uses abbreviations but it helps you avoid backward caret jumps as you craft the code. It also allows you to manipulate existing code as you add the dot and then the abbreviation for the postfix completion you want to use, for example ifn for if null.
Finally, statement completion is one of my favourites because it adds the correct parentheses, braces, and semicolons to my code! The shortcut is ⇧⌘⏎ (macOS), Ctrl+Shift+Enter (Windows/Linux). This is just one you need to try out, granted three key presses is more than one semi-colon but it’s very helpful because it reduces errors in my code. I also find I can quickly use ⇧⏎ (macOS), or Shift+Enter (Windows/Linux) to create a new line – it’s just a syntactically pleasing combination!
#3 – On-Demand Error Highlighting
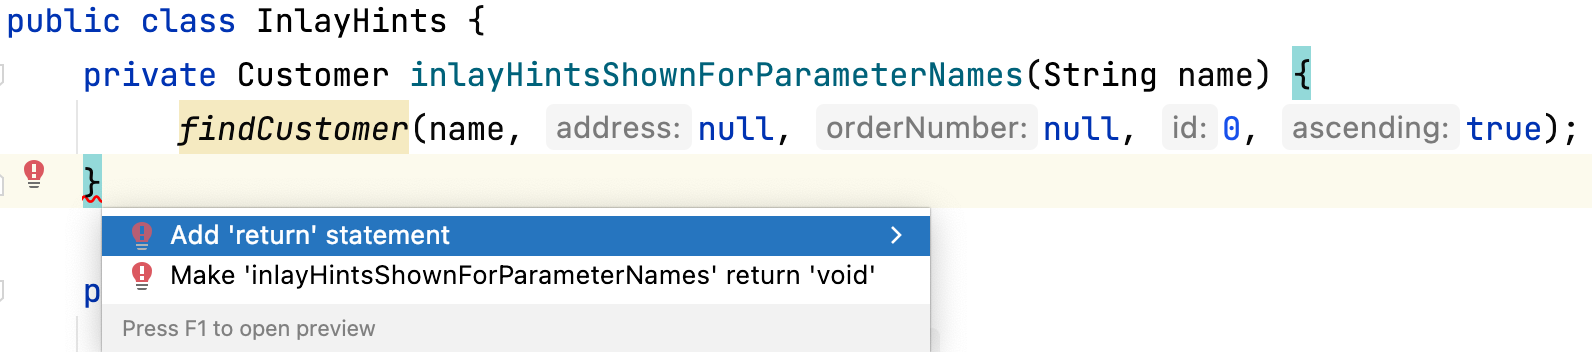
You can write code and see error highlighting in real-time in IntelliJ IDEA, no more waiting for the compiler; if your code isn’t going to compile, IntelliJ IDEA will tell you about it straight away. I prefer to fix errors as they happen, usually with Quick Intentions which is ⌥⏎ (macOS), Alt+Enter (Windows/Linux). IntelliJ IDEA helpfully gives you a little red light-bulb when there’s an error with your code:
Alternatively, you can use F2 to navigate to each error in your Project or use the Problems tool window which is ⌘6 (macOS), or Alt+6 (Windows/Linux) to get an overview of any problems across your project.

If you search the IntelliJ IDEA tip page for “quick intentions” it will give you a flavour of some of the ways it can help.
#4 – Customisation
I would be remiss if I didn’t mention how much I love being able to customise IntelliJ IDEA. Fortunately, it comes packed with sensible default options but equally allows you to customise these over time as you get more familiar with the product. Of course, I don’t use 95% of the customisations but the point is that I can and many people in the community do. That said, the 5% I do use makes my authoring experience a more enjoyable and productive one. The best way to get an idea of what IntelliJ IDEA is capable of in the customisation department is to go to your Settings/Preferences with ⌘, (macOS), or Ctrl+Alt+S (Windows/Linux). You can then browse and view the groupings on the left such as Appearance & Behavior and Editor. My favourites customisation are:
- Show virtual white space at the bottom of the file
- Enable soft wrap
- Distraction mode in IntelliJ IDEA
#5 – Tight Integration
I couldn’t come up with a better name for this one, but fundamentally it’s the integration part of the IDE. It’s easy to take this part for granted because IntelliJ IDEA makes it look easy, however integration with tools such as Git, Maven, Gradle, Docker and more in both IntelliJ IDEA Community Edition and IntelliJ IDEA Ultimate.
Having a one-stop shop for all your coding needs really is a productivity boost, plus there’s no more faffing about configuring external tools to work with your coding tool because it’s all neatly integrated!