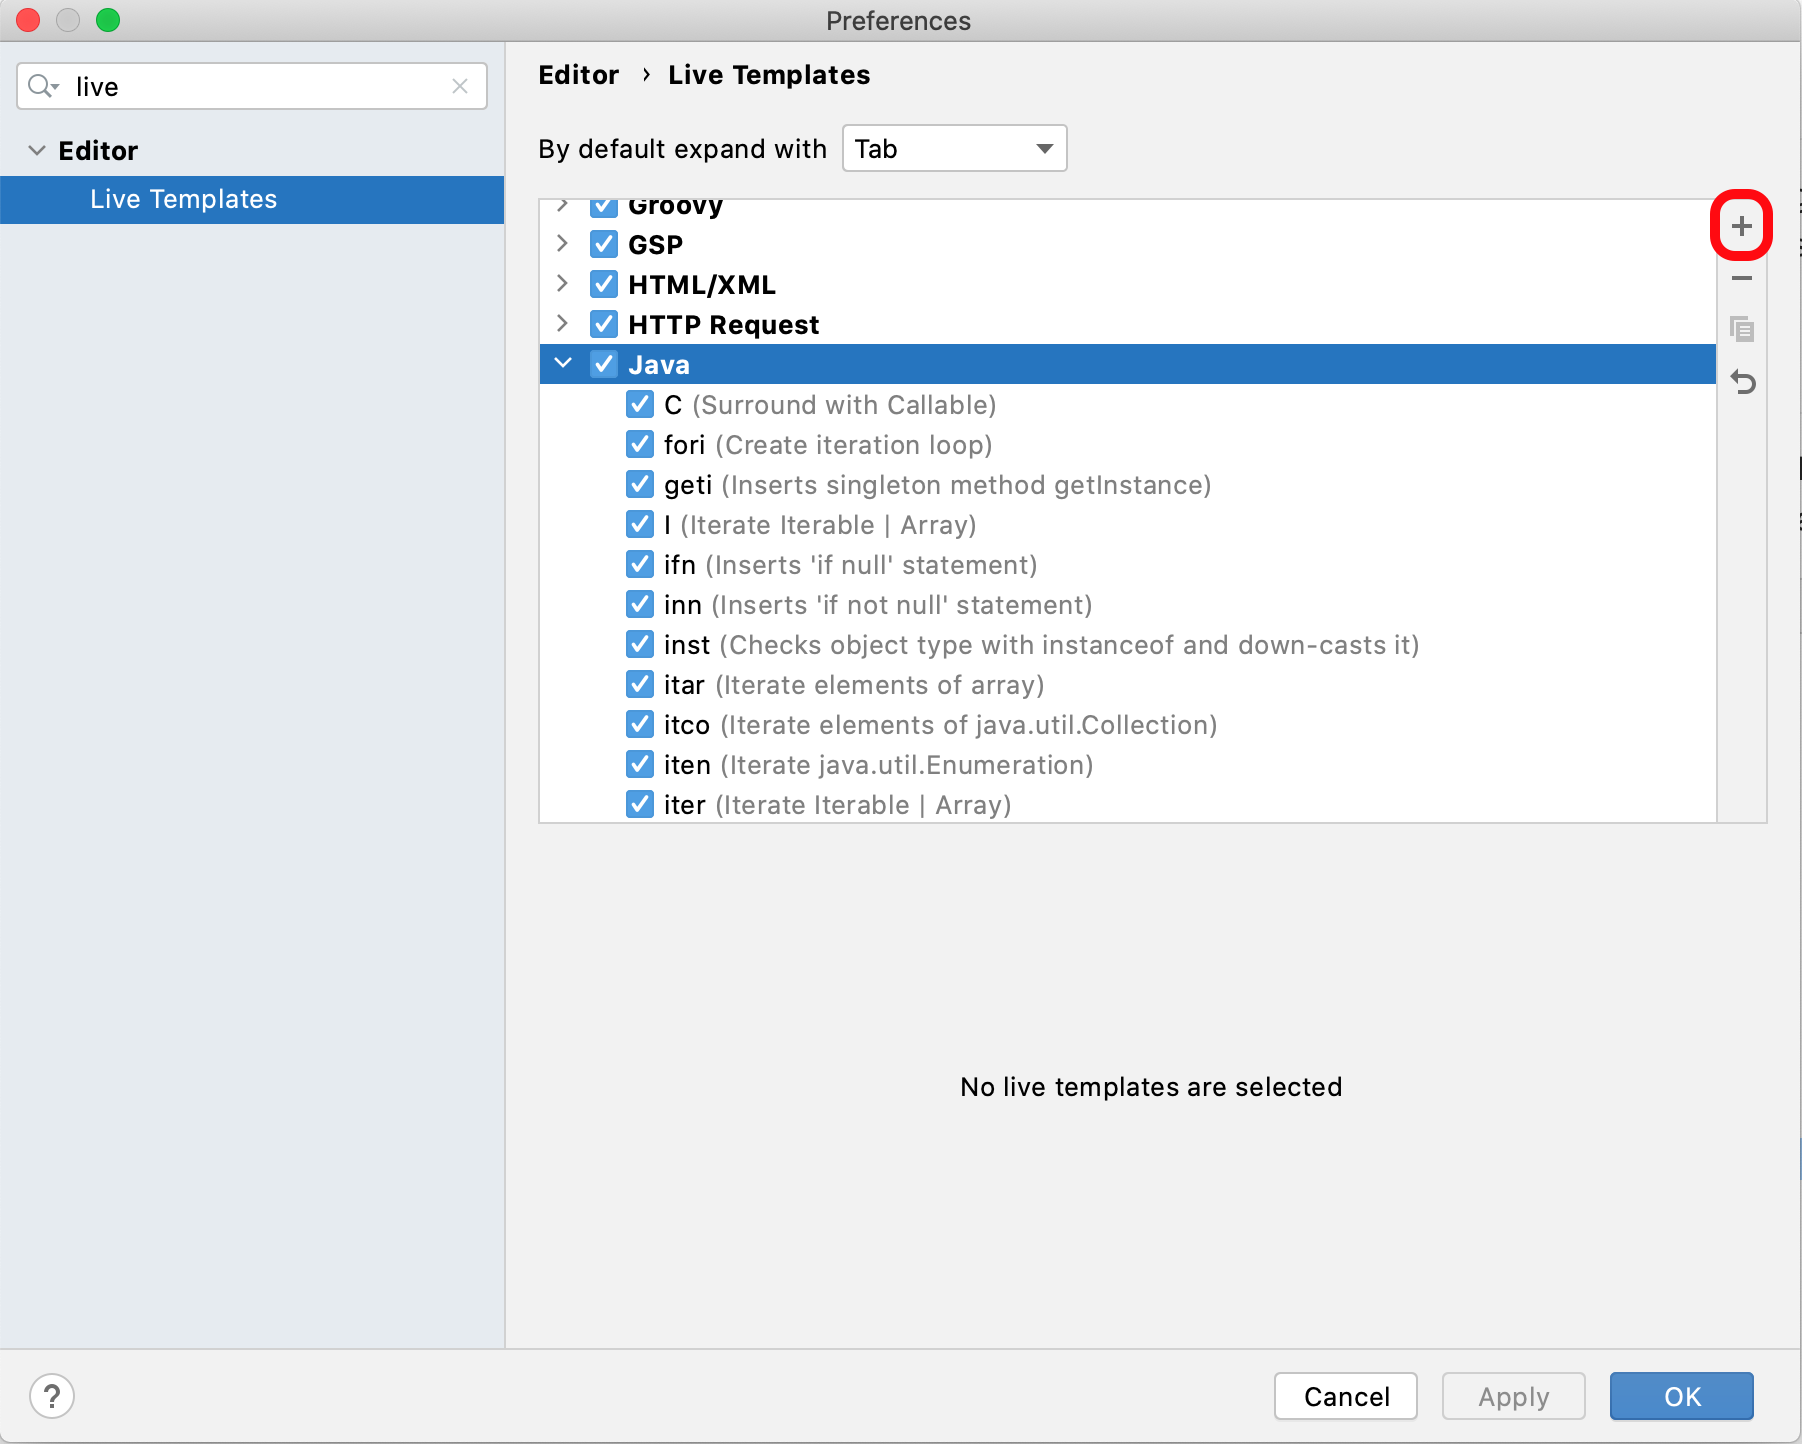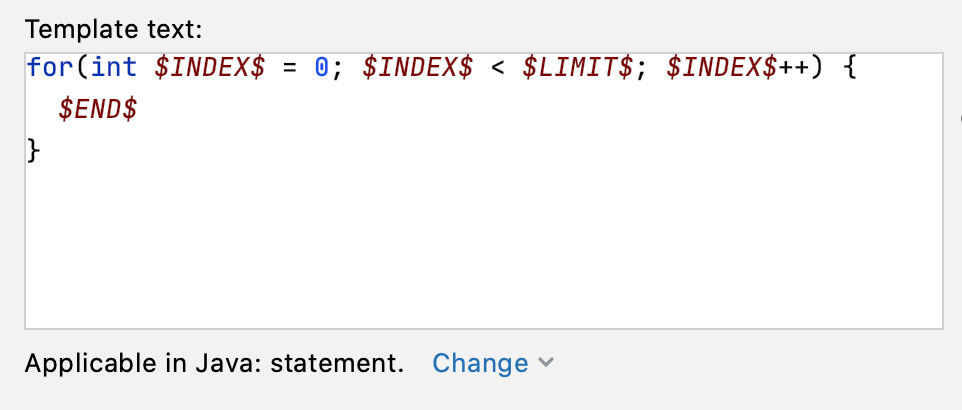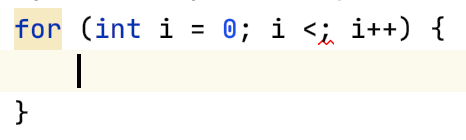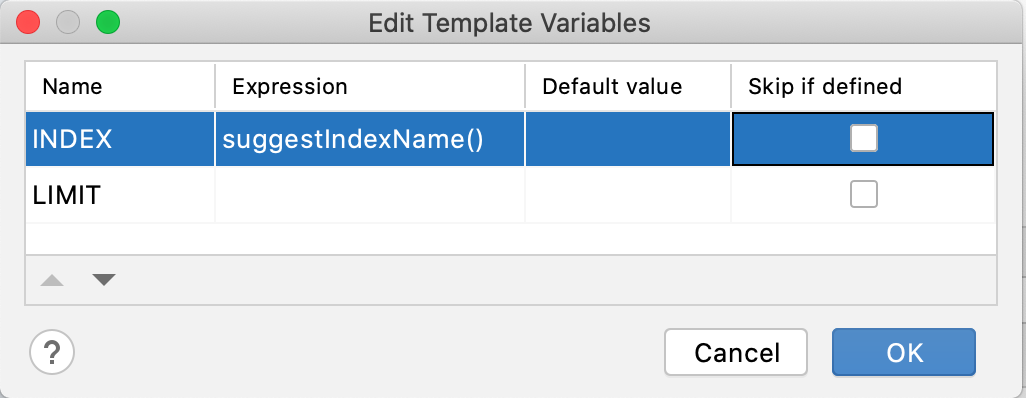
We’ve all heard of the benefits of pairing when it comes to coding, many of us have done it in our jobs and reaped the rewards, but have you ever paired to write English?
The agreement
Last week I suggested that we, Trisha Gee and I, do exactly that. We were both struggling to get into the zone of some written content that needed creating, and I’ve always wanted to try pairing on writing. I’ve benefited myself from pairing on code and, as a sole technical writer in the past, I’ve watched with envy as developers paired on their deliverables as I cracked on with me, myself and I for collaboration. Trisha agreed that we could try it so here’s the honest account of how pair-writing went, and what I learned.
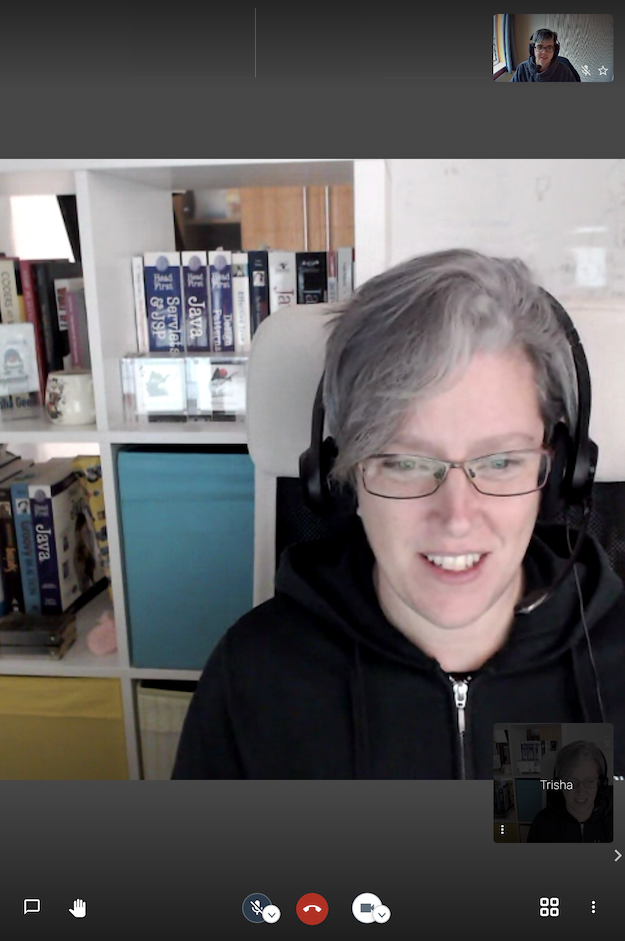
We set aside two hours for the process. We were writing the content in IntelliJ IDEA, so we opted to use the new Code With Me functionality, so we could share our session in real-time with audio and video for the full 2021 remote-pairing experience. First up, we installed the plugin (currently experimental) and then we joined the Code With Me video call.
We spent a few minutes messing about with Code With Me, working out what we could and couldn’t do and then Trisha talked me through the pairing model of a driver and a navigator. In this model, one person drives (types) and one person navigates (thinks and talks). At this point, we both agreed I would drive, and Trisha would navigate because she knew the subject well, and I can type pretty fast on a good day. With the roles assigned, I put on my racing helmet, got into my rally car, and strapped myself in. While I was amusing myself with my fantasy car world, Trisha was creating a Scratch file to dump notes in that she wanted to come back to as she was navigating us around the track.

The pairing
Okay, so, we’re off. I was quite nervous about how it would work given I had pushed for it, but I kept up with the musings from Trisha and adopted shorthand where necessary. I surprised myself at how few mistakes I made. I was keen to ensure that what I noted down would be legible and understandable because I would be using my notes to turn the content into customer-facing content later. If I couldn’t do that quickly and easily, then this whole process wouldn’t be worth it. It would still be useful in that we would know that pair-writing doesn’t work, but that would be about it.
I kept an eye on the clock, and I think we were probably chatting for about 35 minutes in total. We were rudely interrupted by a phone call from my solicitor, which I had to take to try and keep my impending (and exceedingly stressful) house move on track. That is the point that we pulled off the race track. I think I’m probably done with that analogy now.
Image by Dimitris Vetsikas from Pixabay

The mistake
Before we finished the pairing session, Trisha was keen to get some inline code working that was being pulled in from another project. She talked me through how to add an attribute for the Asciidoc Plugin so that the code would be pulled in. Unfortunately, it didn’t work, so, after much discussion and bemusement, we decided that the experimental Code With Me plugin might be the problem.
We left that call and hopped on a different video call to troubleshoot. It’s entirely possible that Code With Me was not in any way the problem, and the problem was that the code I was trying to grab hadn’t been pushed, but we’ll just leave that one there!
Image by Craig Steffan from Pixabay

The write-up
Skip ahead three days, and it was time to write up the notes from the pairing session. I was apprehensive because I was worried I wouldn’t understand my notes, but I was pleasantly surprised! Of course with a typical code pairing session, you wouldn’t walk away from it with half-baked, non-compiling code, but I was hopeful that my brain could make the notes I’d written previously into effective content; the equivalent of compiling code.
The first thing I did was commit the notes from the pairing session locally. Yes, I could have just deleted them and then used IntelliJ IDEA’s Local History, but I thought I’d go down the commit route for posterity and longer-term tracking. Once I’d committed it, I started hacking up the content. I went paragraph by paragraph reworking my driver notes into useful pros. It took me 30 minutes on the dot. I committed the updated topic and felt extremely pleased with myself. It had worked!
Image by Daniel Agrelo from Pixabay

The learnings
It’s not just wine and cheese that go exceptionally well together as it turns out! Pairing works for writing too! In fact, it works really well. If you have one person who knows a lot about the subject they might make a great navigator (not exclusively).
You don’t need to have the same experience, or even the same job role, to pair on something; I recommend you try it. I wish I’d done more of this as a Technical Writer, I think it would have been very successful in a number of professional situations where I needed to create the content and didn’t (yet) have much subject knowledge. I will certainly be doing more of it now!